
Chocolate Panna Cotta is a classic Italian dessert that combines the silkiness of custard with the indulgence of chocolate, all without requiring hours of work in the kitchen. Because let’s be honest—nowadays we are all so busy that sometimes you just want an impressive dish with minimal effort! And if you’re a chocolate lover, there’s nothing quite as satisfying as this rich, creamy, and effortlessly elegant dessert.
Panna Cotta, meaning “cooked cream” in Italian, is traditionally made by simmering cream, sugar, and gelatin to create a delicate, pudding-like consistency. However, unlike traditional custards, panna cotta doesn’t contain eggs, which means no tempering, no baking, and no water baths. Just mix, heat, chill, and enjoy.
While the classic version is vanilla-flavored, chocolate panna cotta takes the classic up a notch by infusing the cream with dark chocolate. The result? A silky, melt-in-your-mouth dessert with deep cocoa flavor that feels fancy but is incredibly simple to prepare. Despite its creamy texture, panna cotta feels lighter than traditional custards or puddings and you only need a handful of pantry staples to whip up this dessert. This chocolate panna cotta is perfect for dinner parties, as it sets in the fridge and can be made a day in advance.
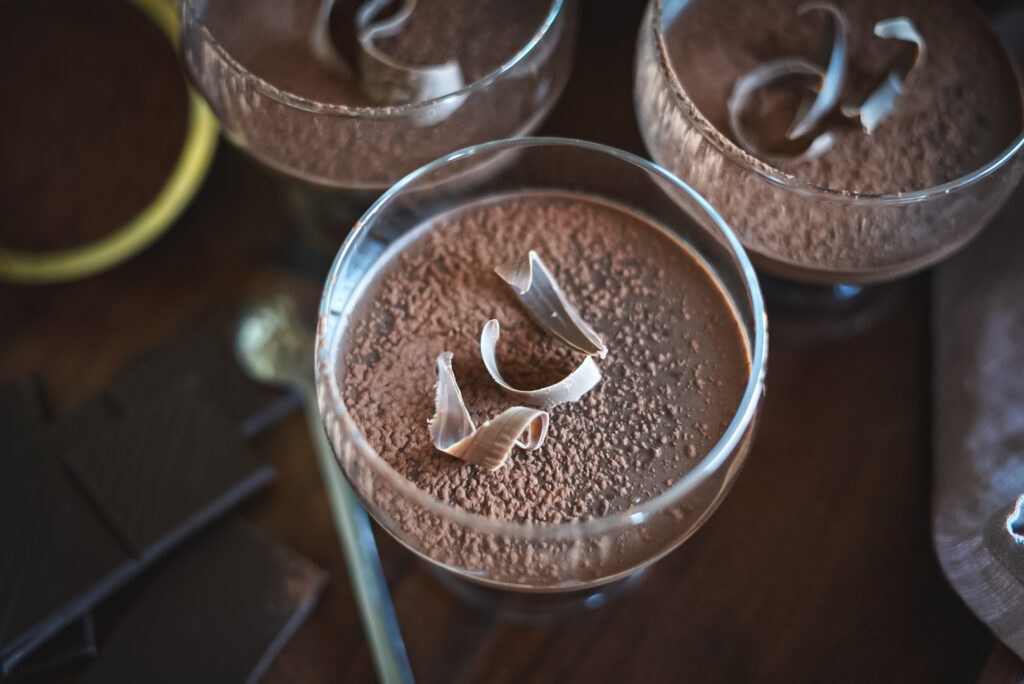
Table of Contents
- INGREDIENTS:
- HOW TO MAKE THIS CHOCOLATE PANNA COTTA:
- FAQ:
- How to store chocolate panna cotta properly:
INGREDIENTS:
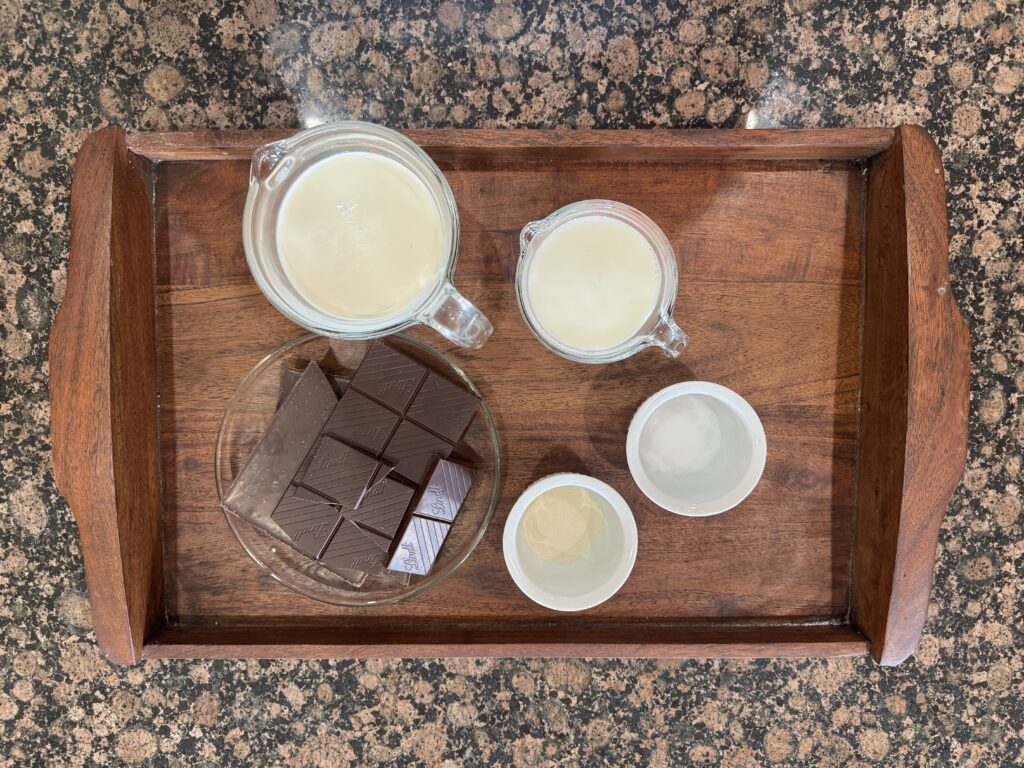
- Heavy Cream
- Whole Milk
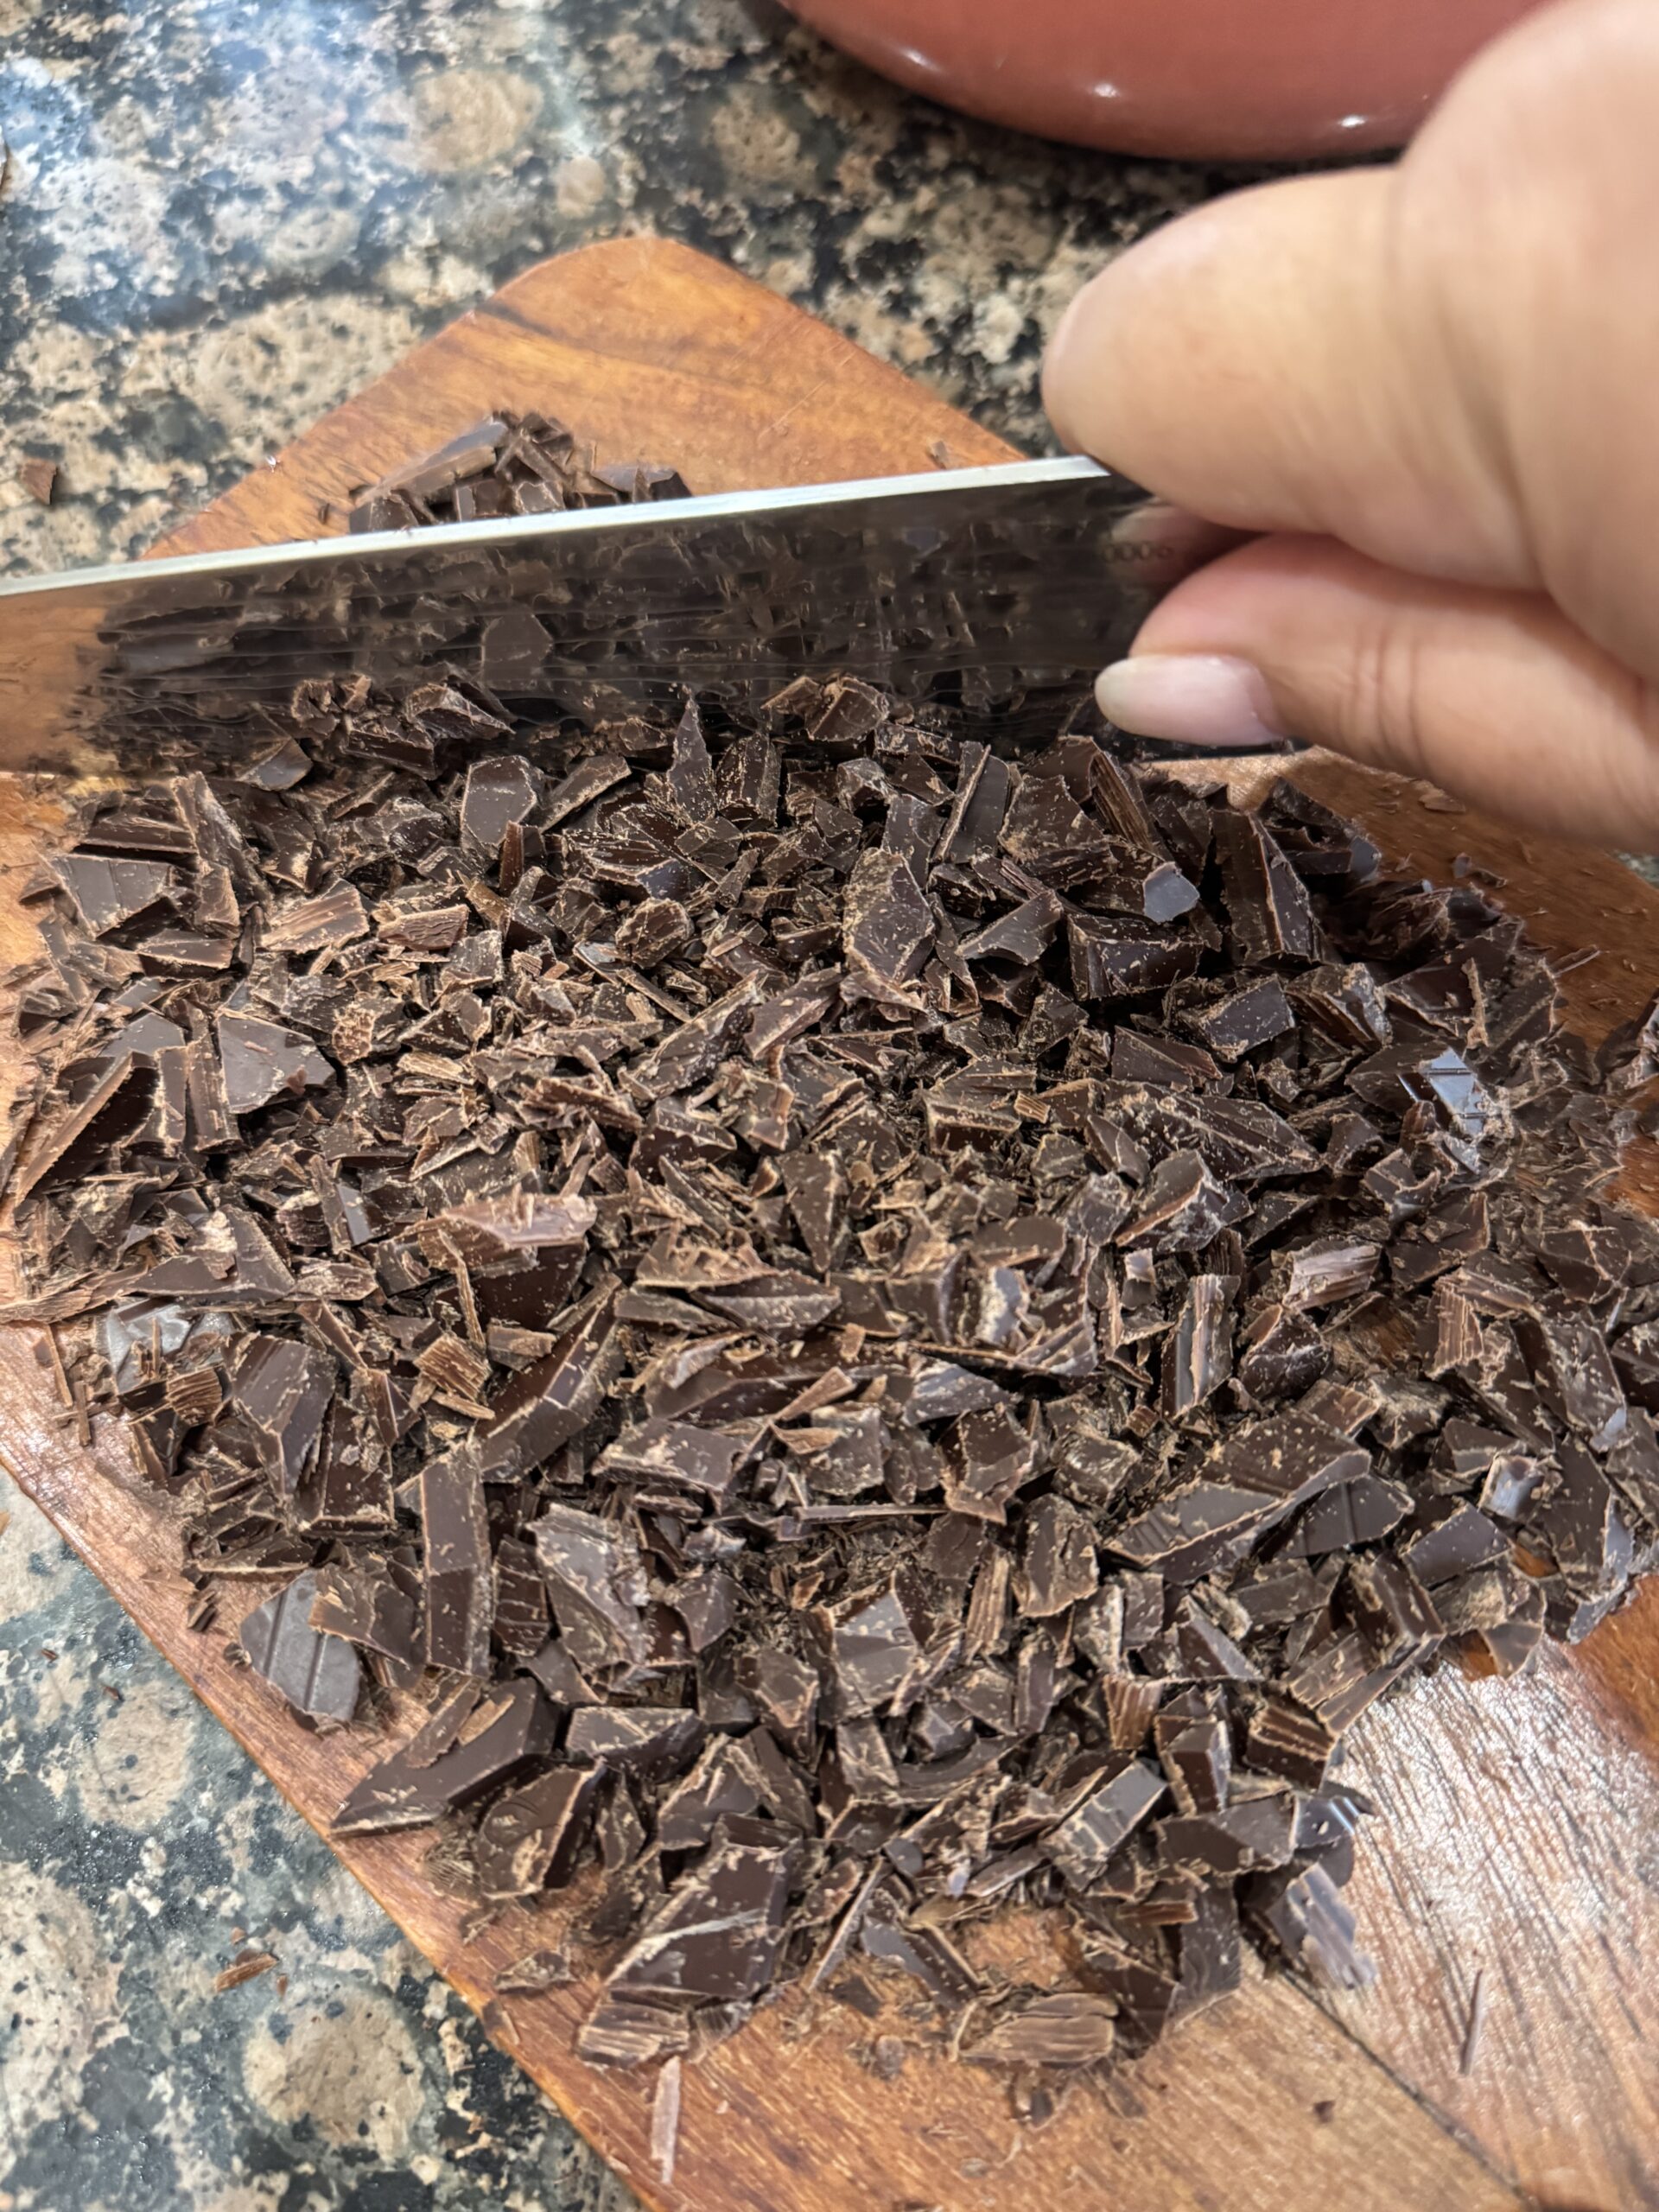
- Dark Chocolate (70%)
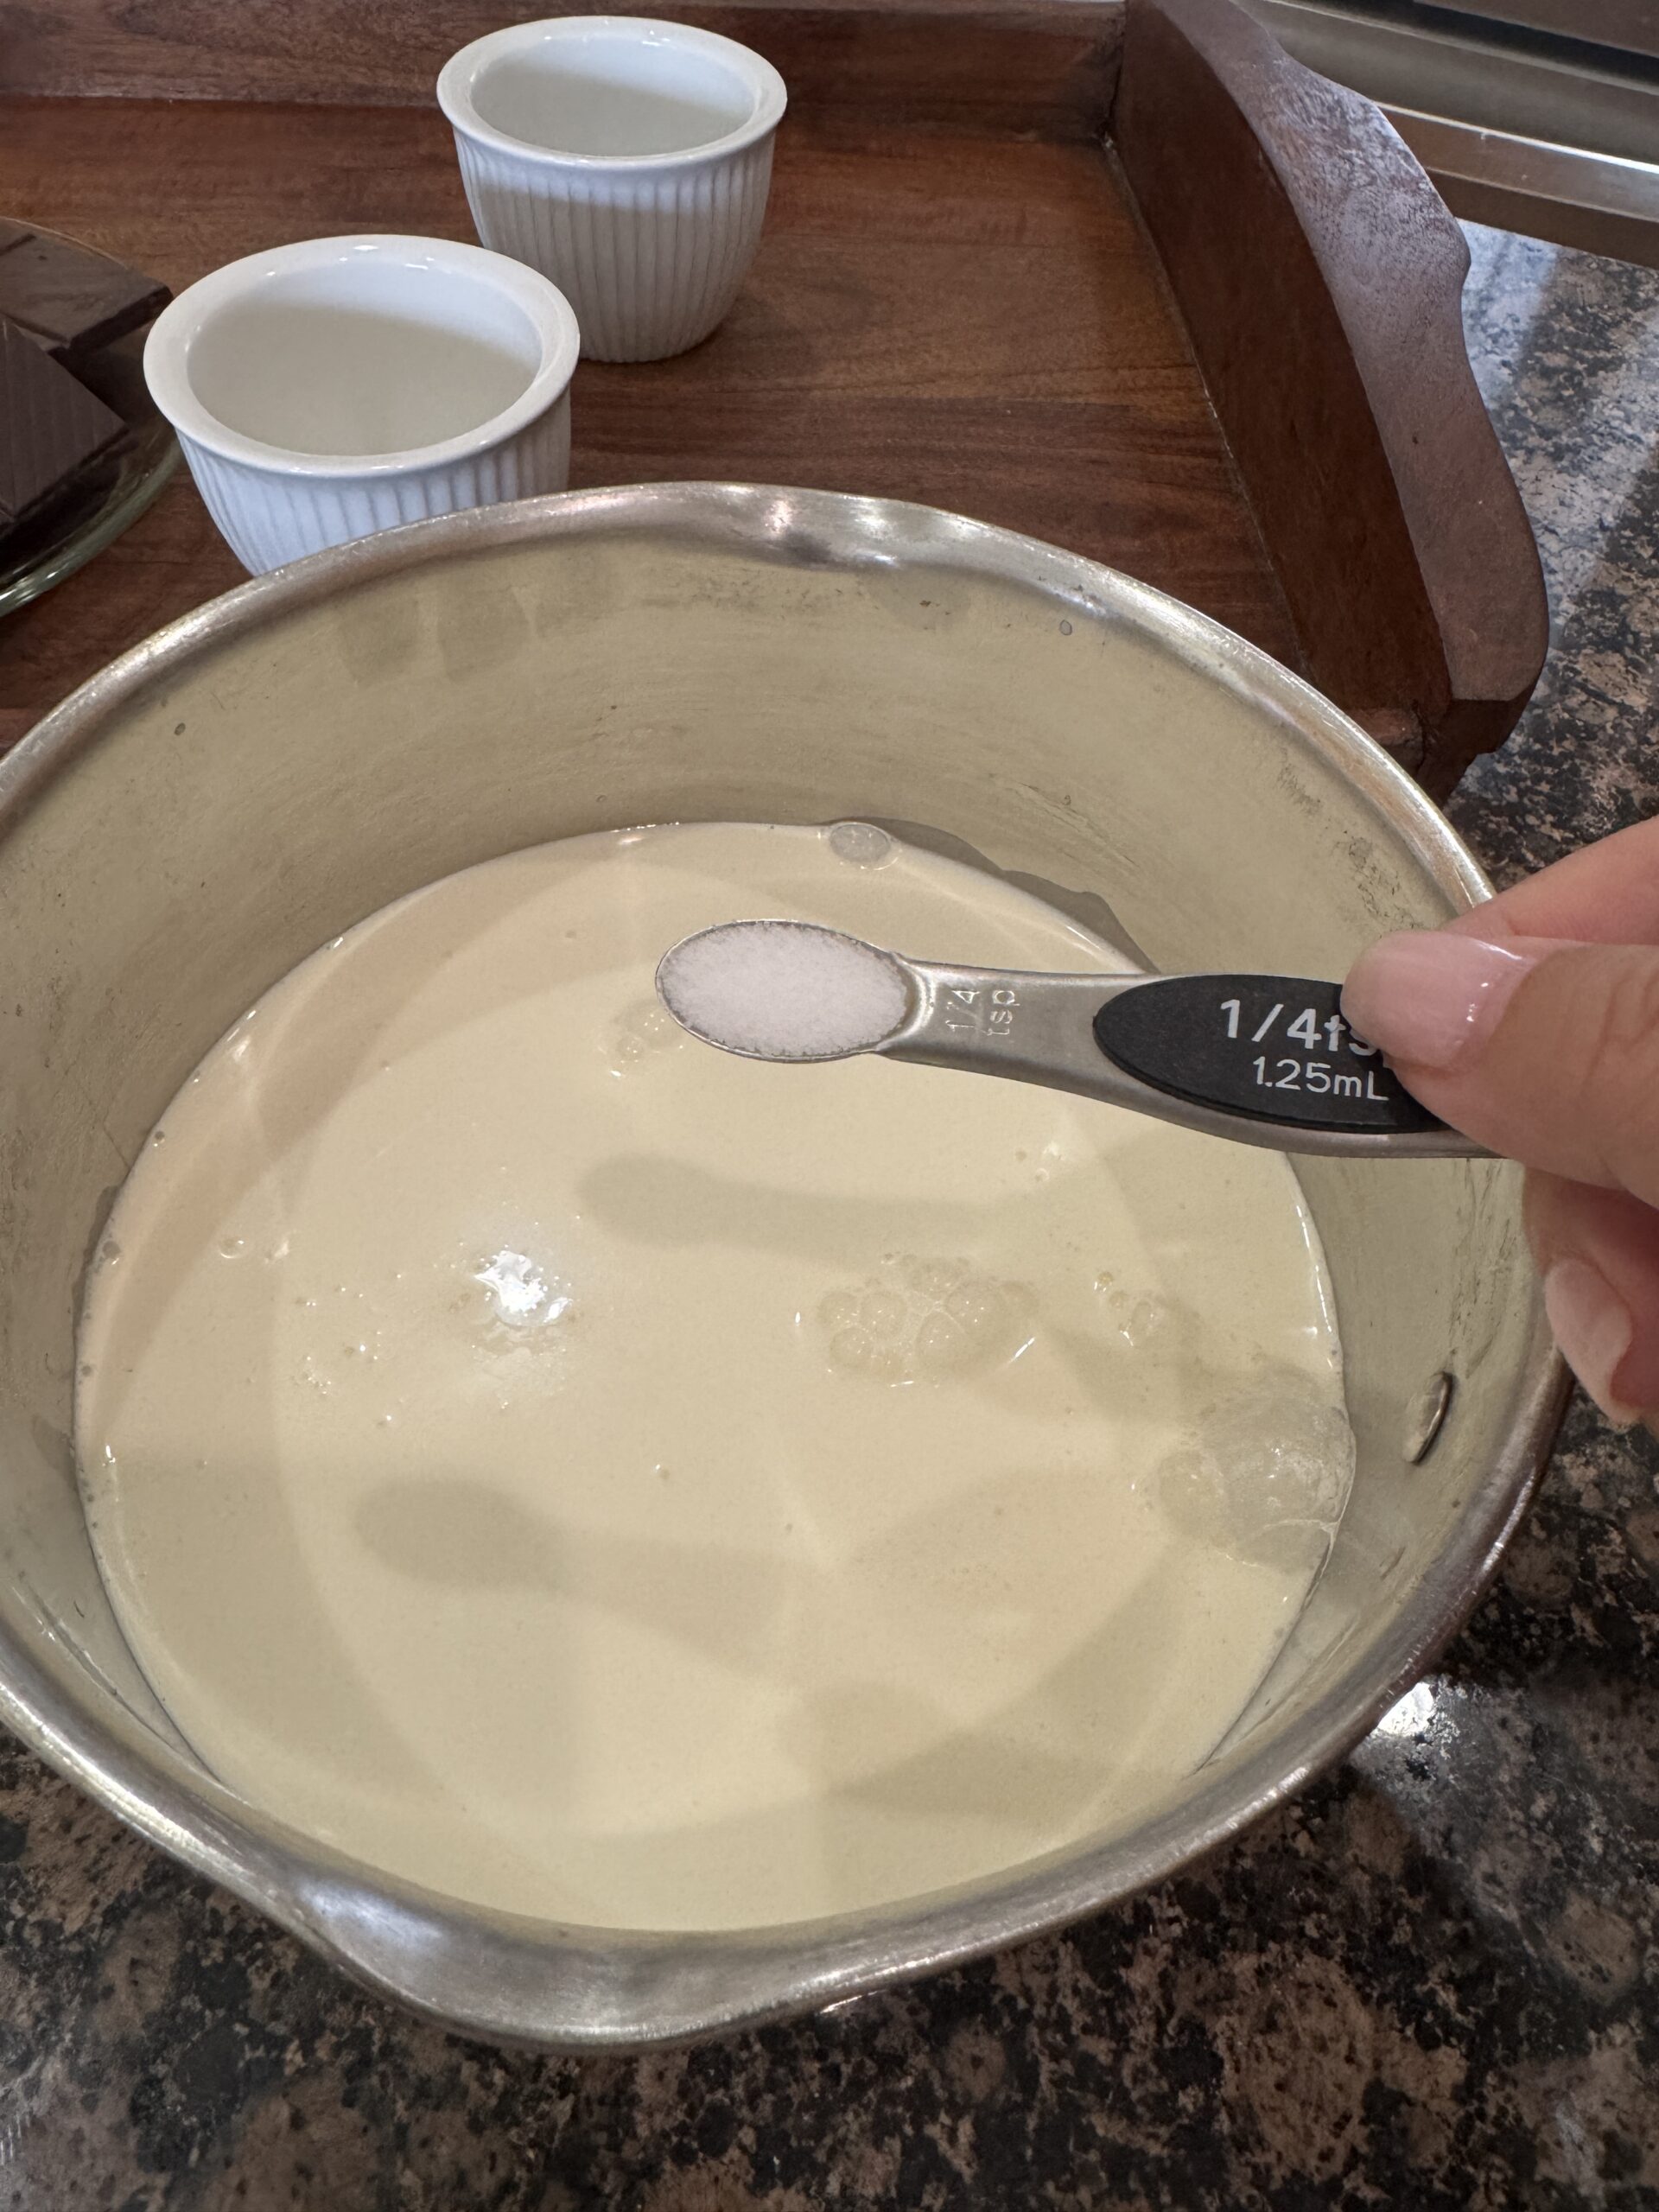
- Salt
- Unflavored gelatin
- Sugar (optional)
The amount of sugar in panna cotta is totally adjustable depending on your taste and the type of chocolate you use. Since chocolate already contains some sweetness, you might need more or less sugar depending on your preference. I like the bitter bite in dark chocolate so I’ll either skip the sugar altogether or add just a few tablespoons just to take the edge of bitterness off.
Recommended Sugar Amounts:
- Dark chocolate (70% cocoa or higher): Use ¼ to ⅓ cup sugar to balance the bitterness.
- Semi-sweet chocolate (50-60% cocoa): Use 2 to 3 tablespoons sugar for a lightly sweet dessert.
- Milk chocolate: You might not need any sugar at all! Milk chocolate is already sweet, so taste before adding sugar.
Tips for Adjusting Sugar:
Taste the mixture before chilling! If it’s not sweet enough, add a little more sugar while the cream is still warm so it dissolves properly.
Want a deeper, richer flavor? Swap white sugar for brown sugar for a subtle caramel note.
Making it sugar-free? Use a natural sweetener like stevia or monk fruit, but adjust carefully since they’re sweeter than regular sugar.
Bottom line: Sugar is totally optional in chocolate panna cotta, so tweak it based on your chocolate choice and personal sweetness level!
HOW TO MAKE THIS CHOCOLATE PANNA COTTA:
- If you plan to unmold the panna cotta, lightly grease ramekins with a neutral oil (such as vegetable or canola oil) and wipe out any excess with a paper towel. This will help release the dessert smoothly.
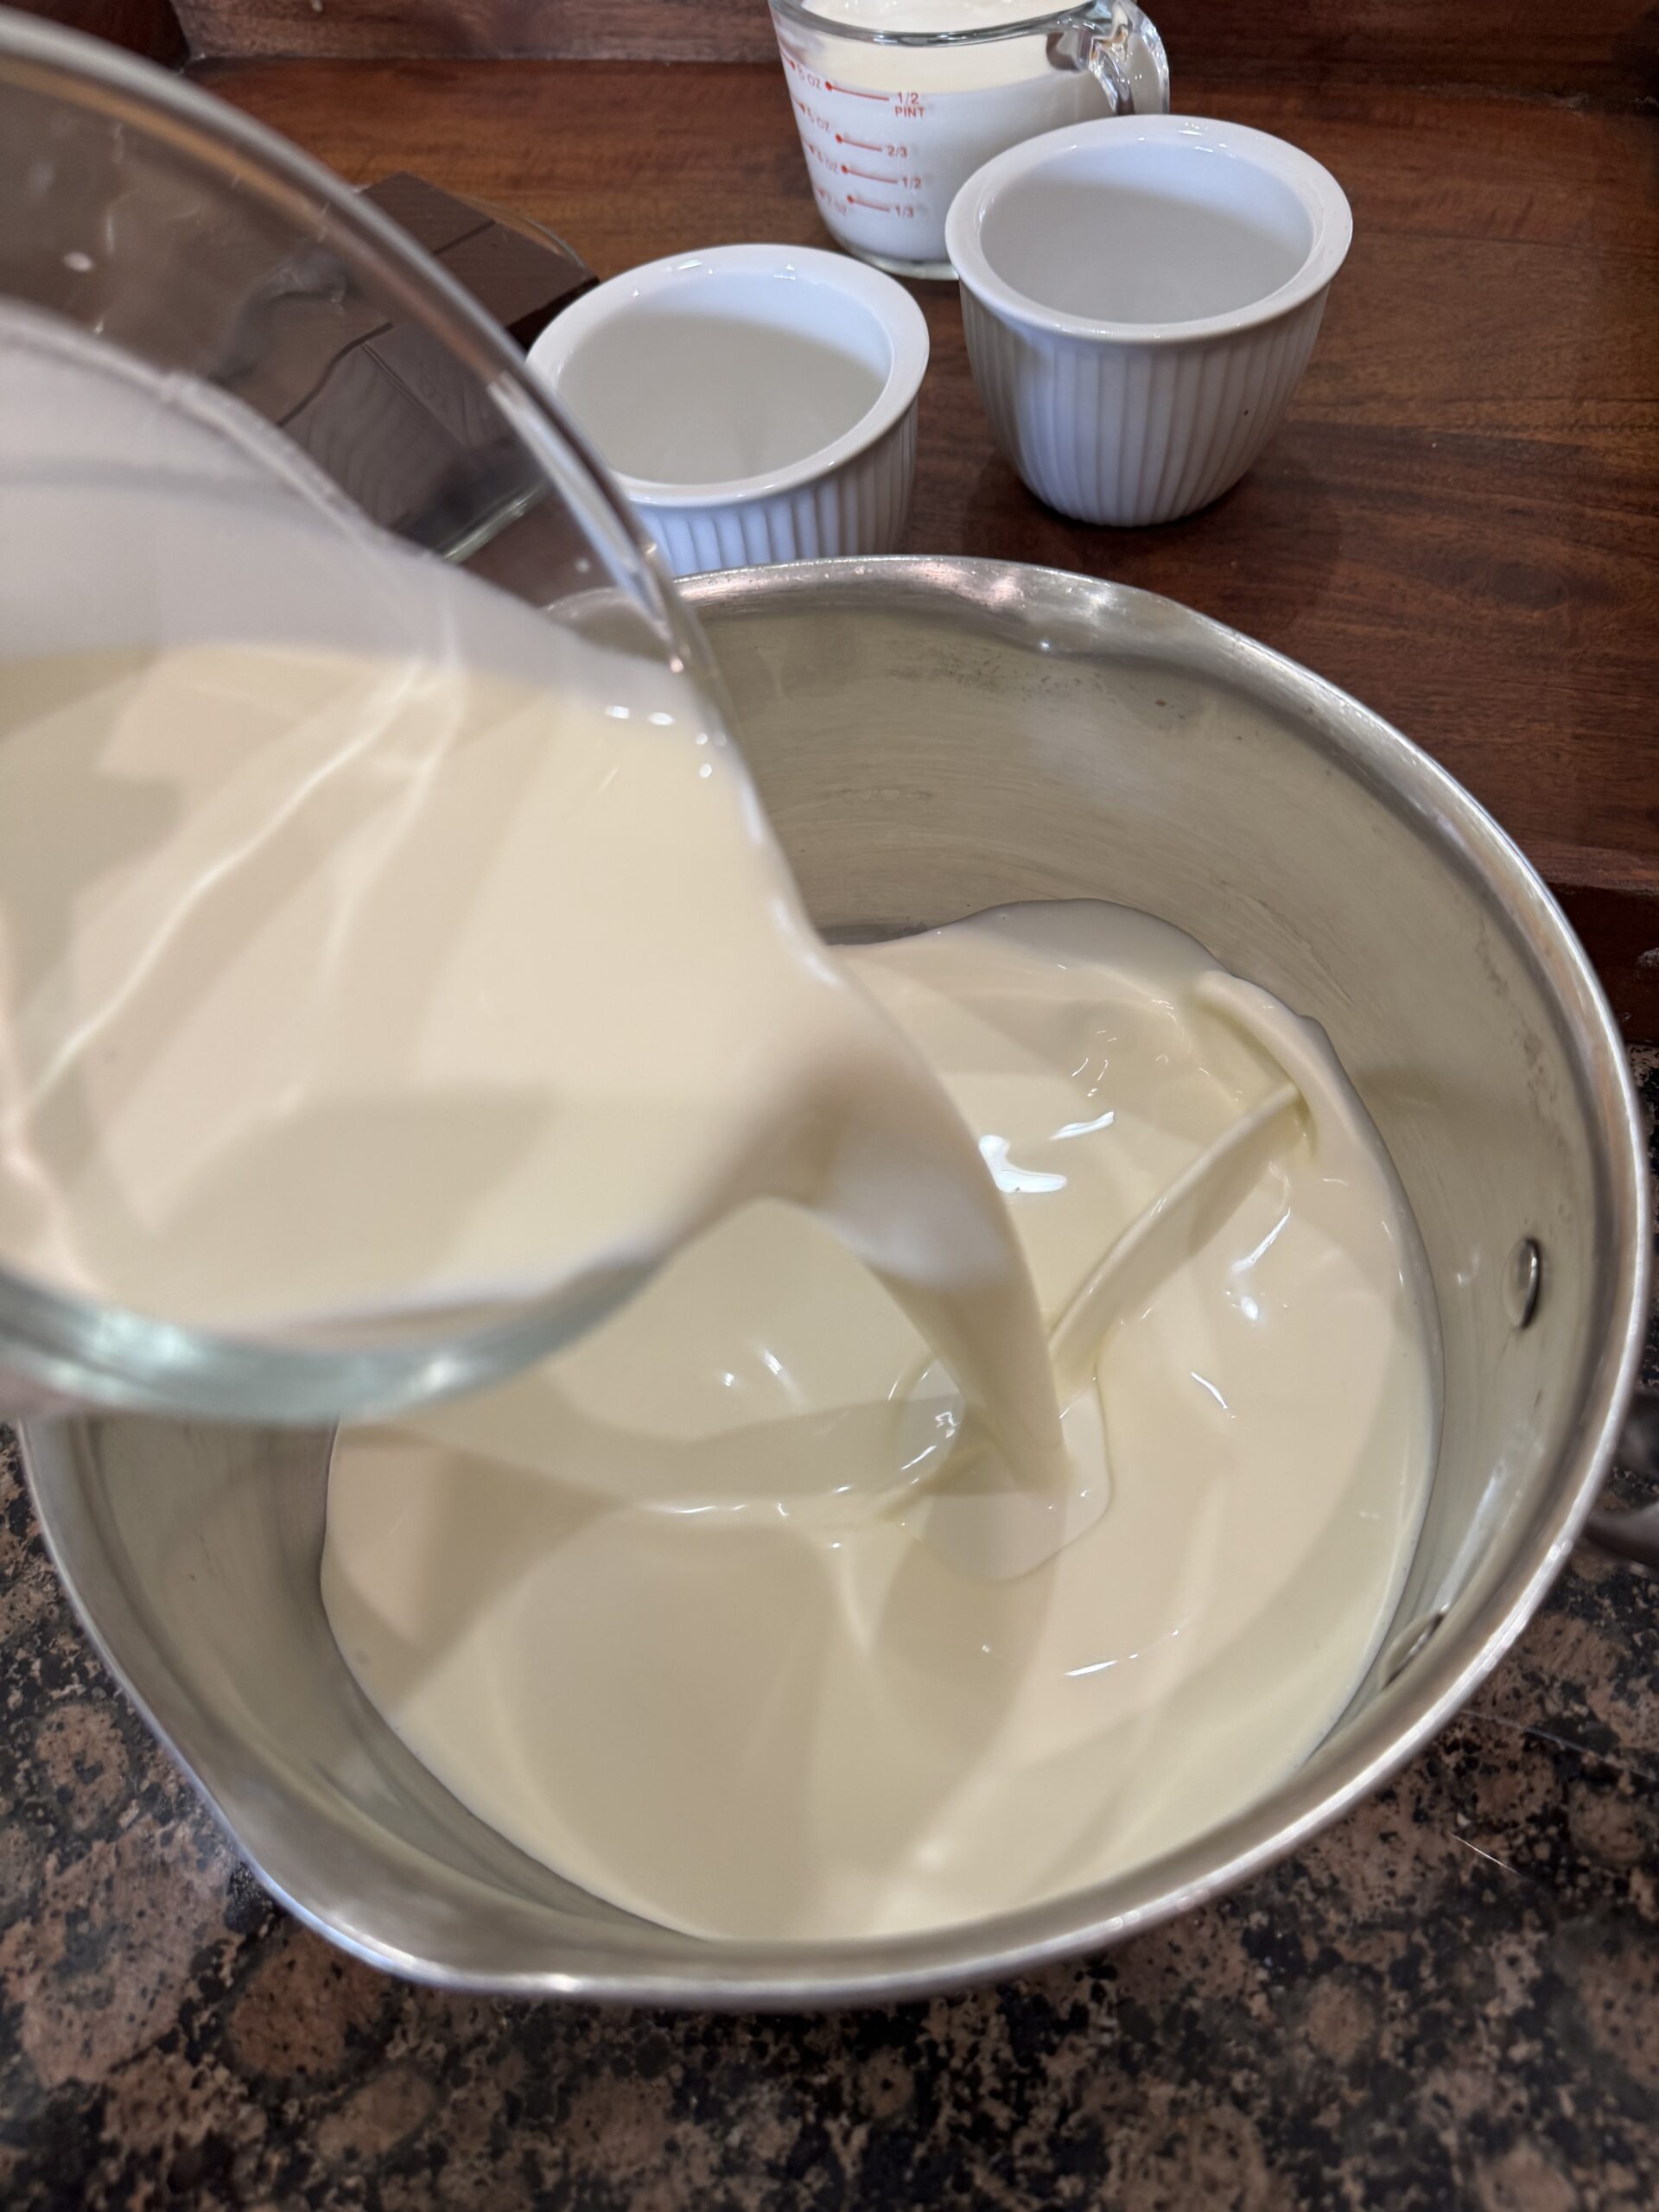
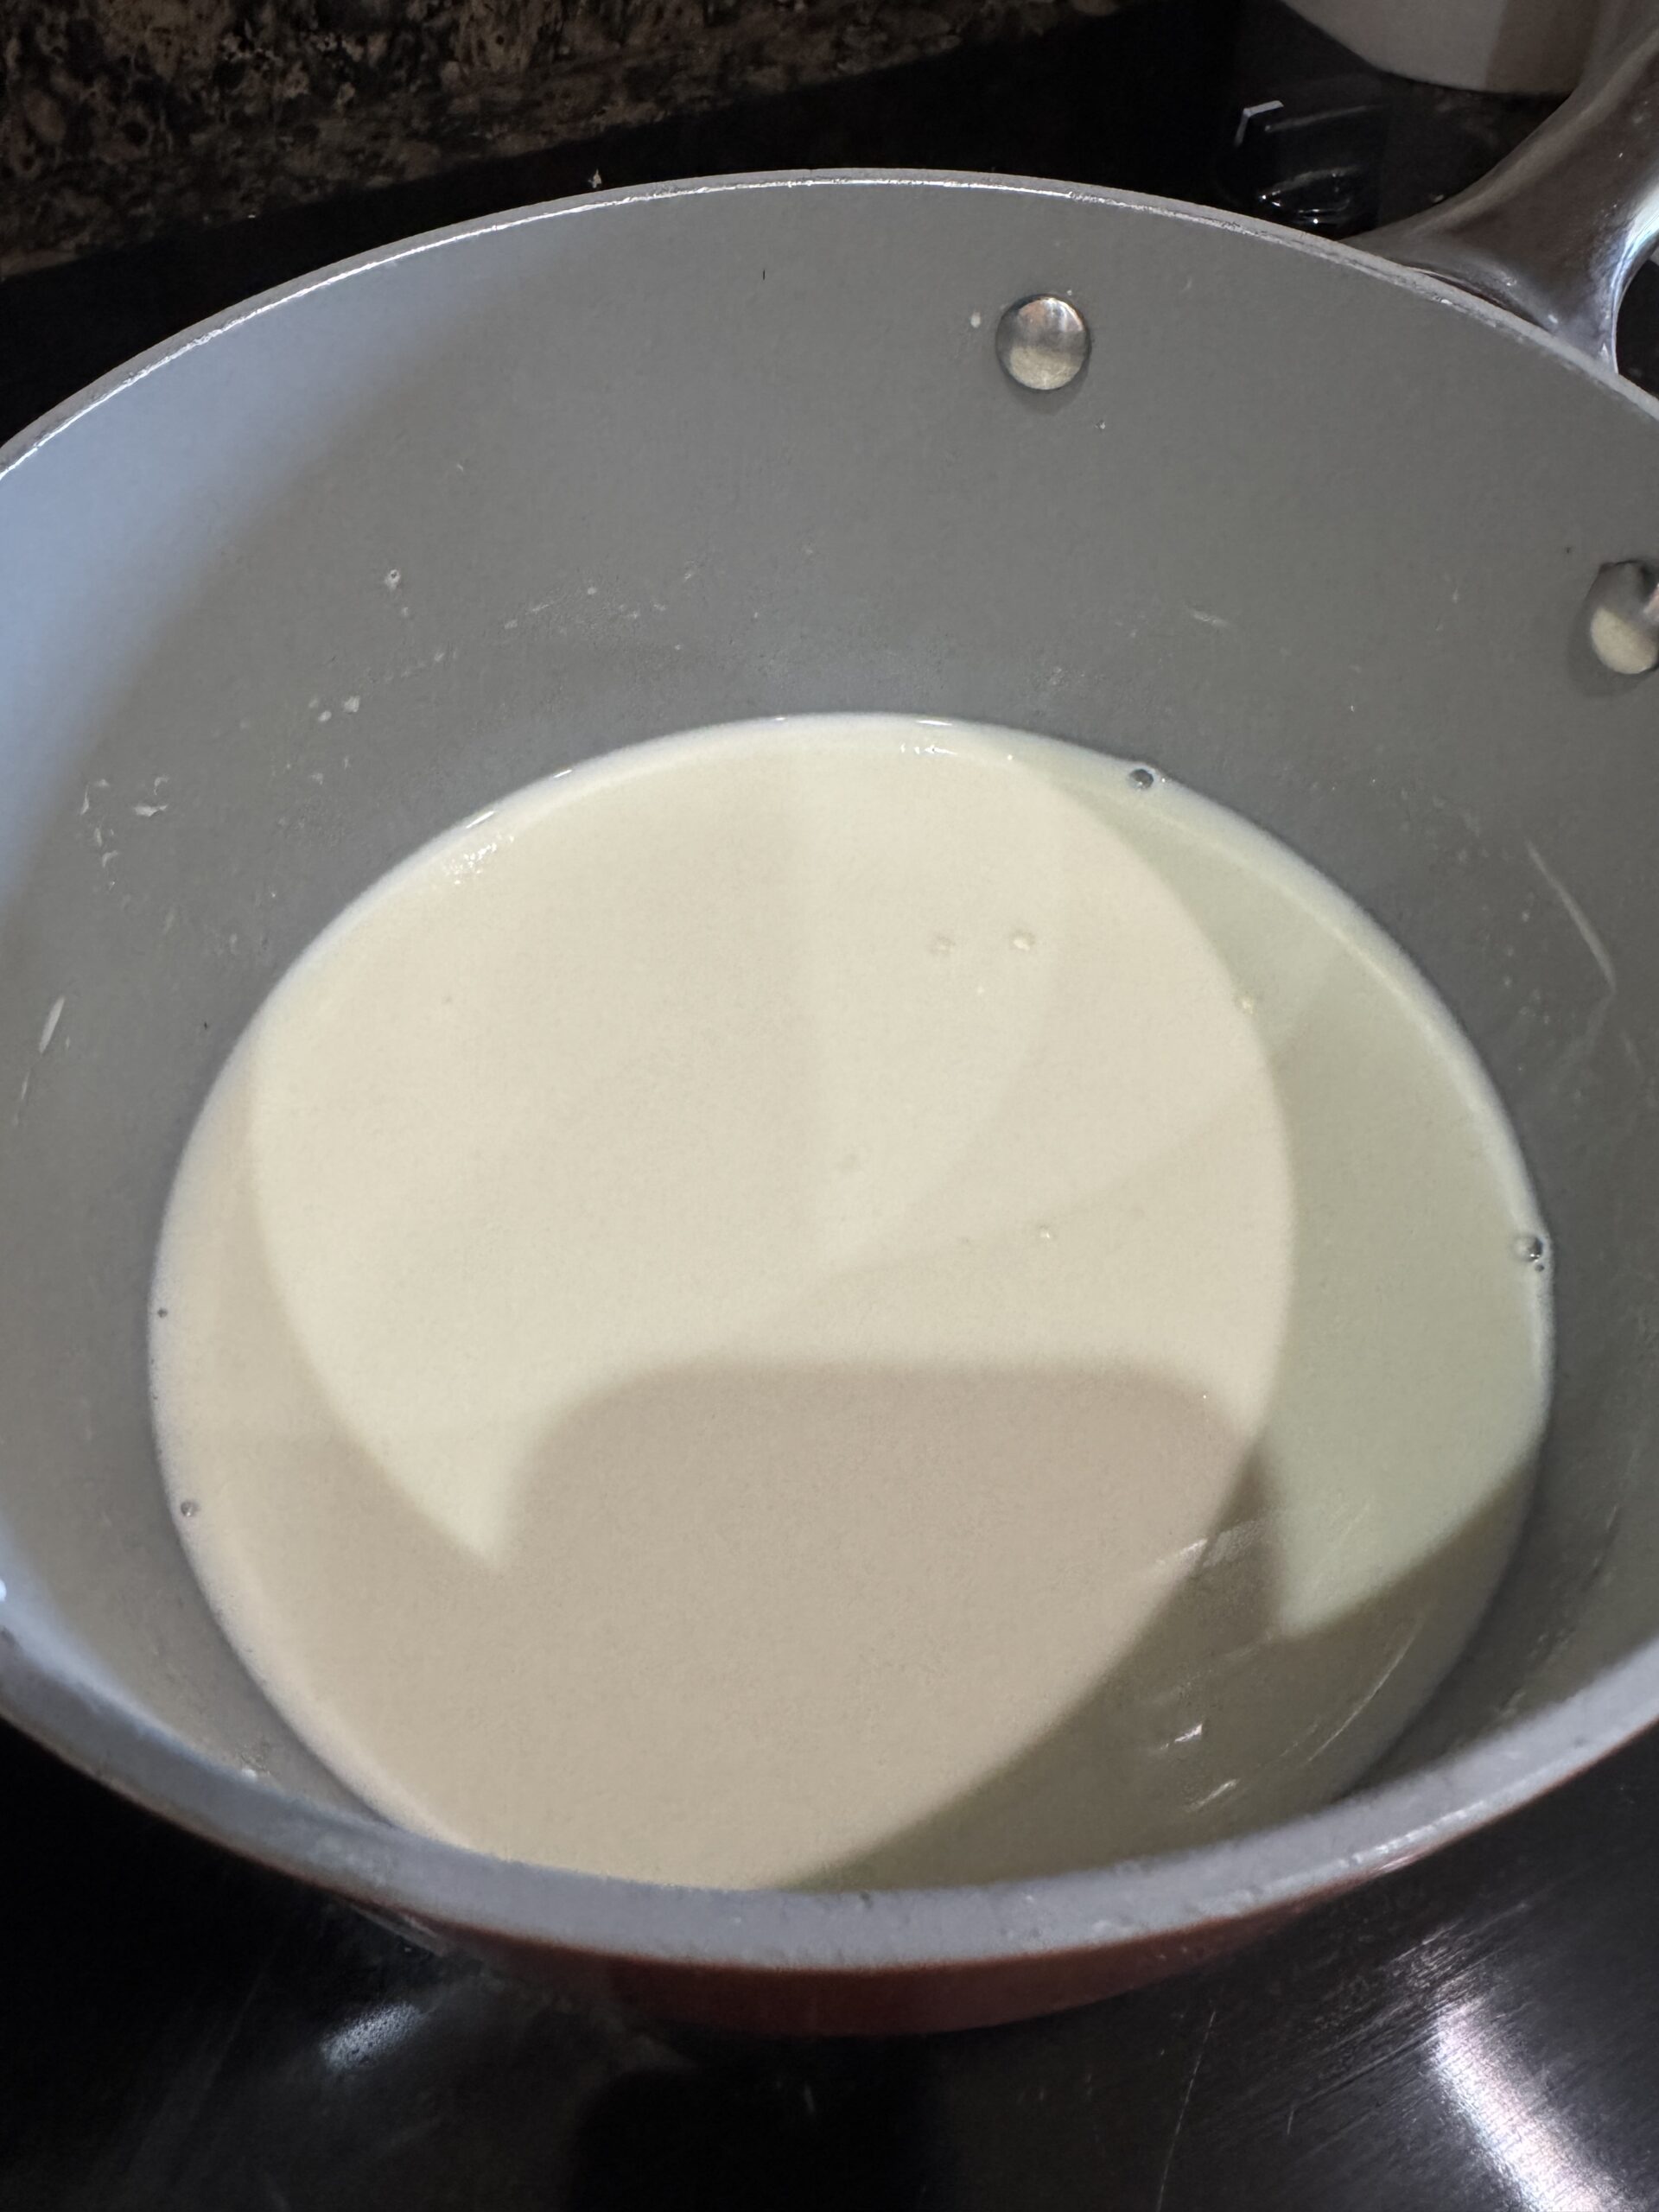
- In a 2-qt. saucepan, pour in the heavy cream and milk; add salt and stir. Once combined, sprinkle gelatin on top of the cold mixture. Allow gelatin to bloom for 5-10 minutes until softened. After 5 minutes, check to see if all of the gelatin is absorbing the liquid, if there are some dry spots remaining, spoon the cream/milk mixture over those spots or gently stir. Continue blooming until all gelatin has absorbed the liquid and become soft.
- Chop your chocolate while waiting for gelatin to bloom.
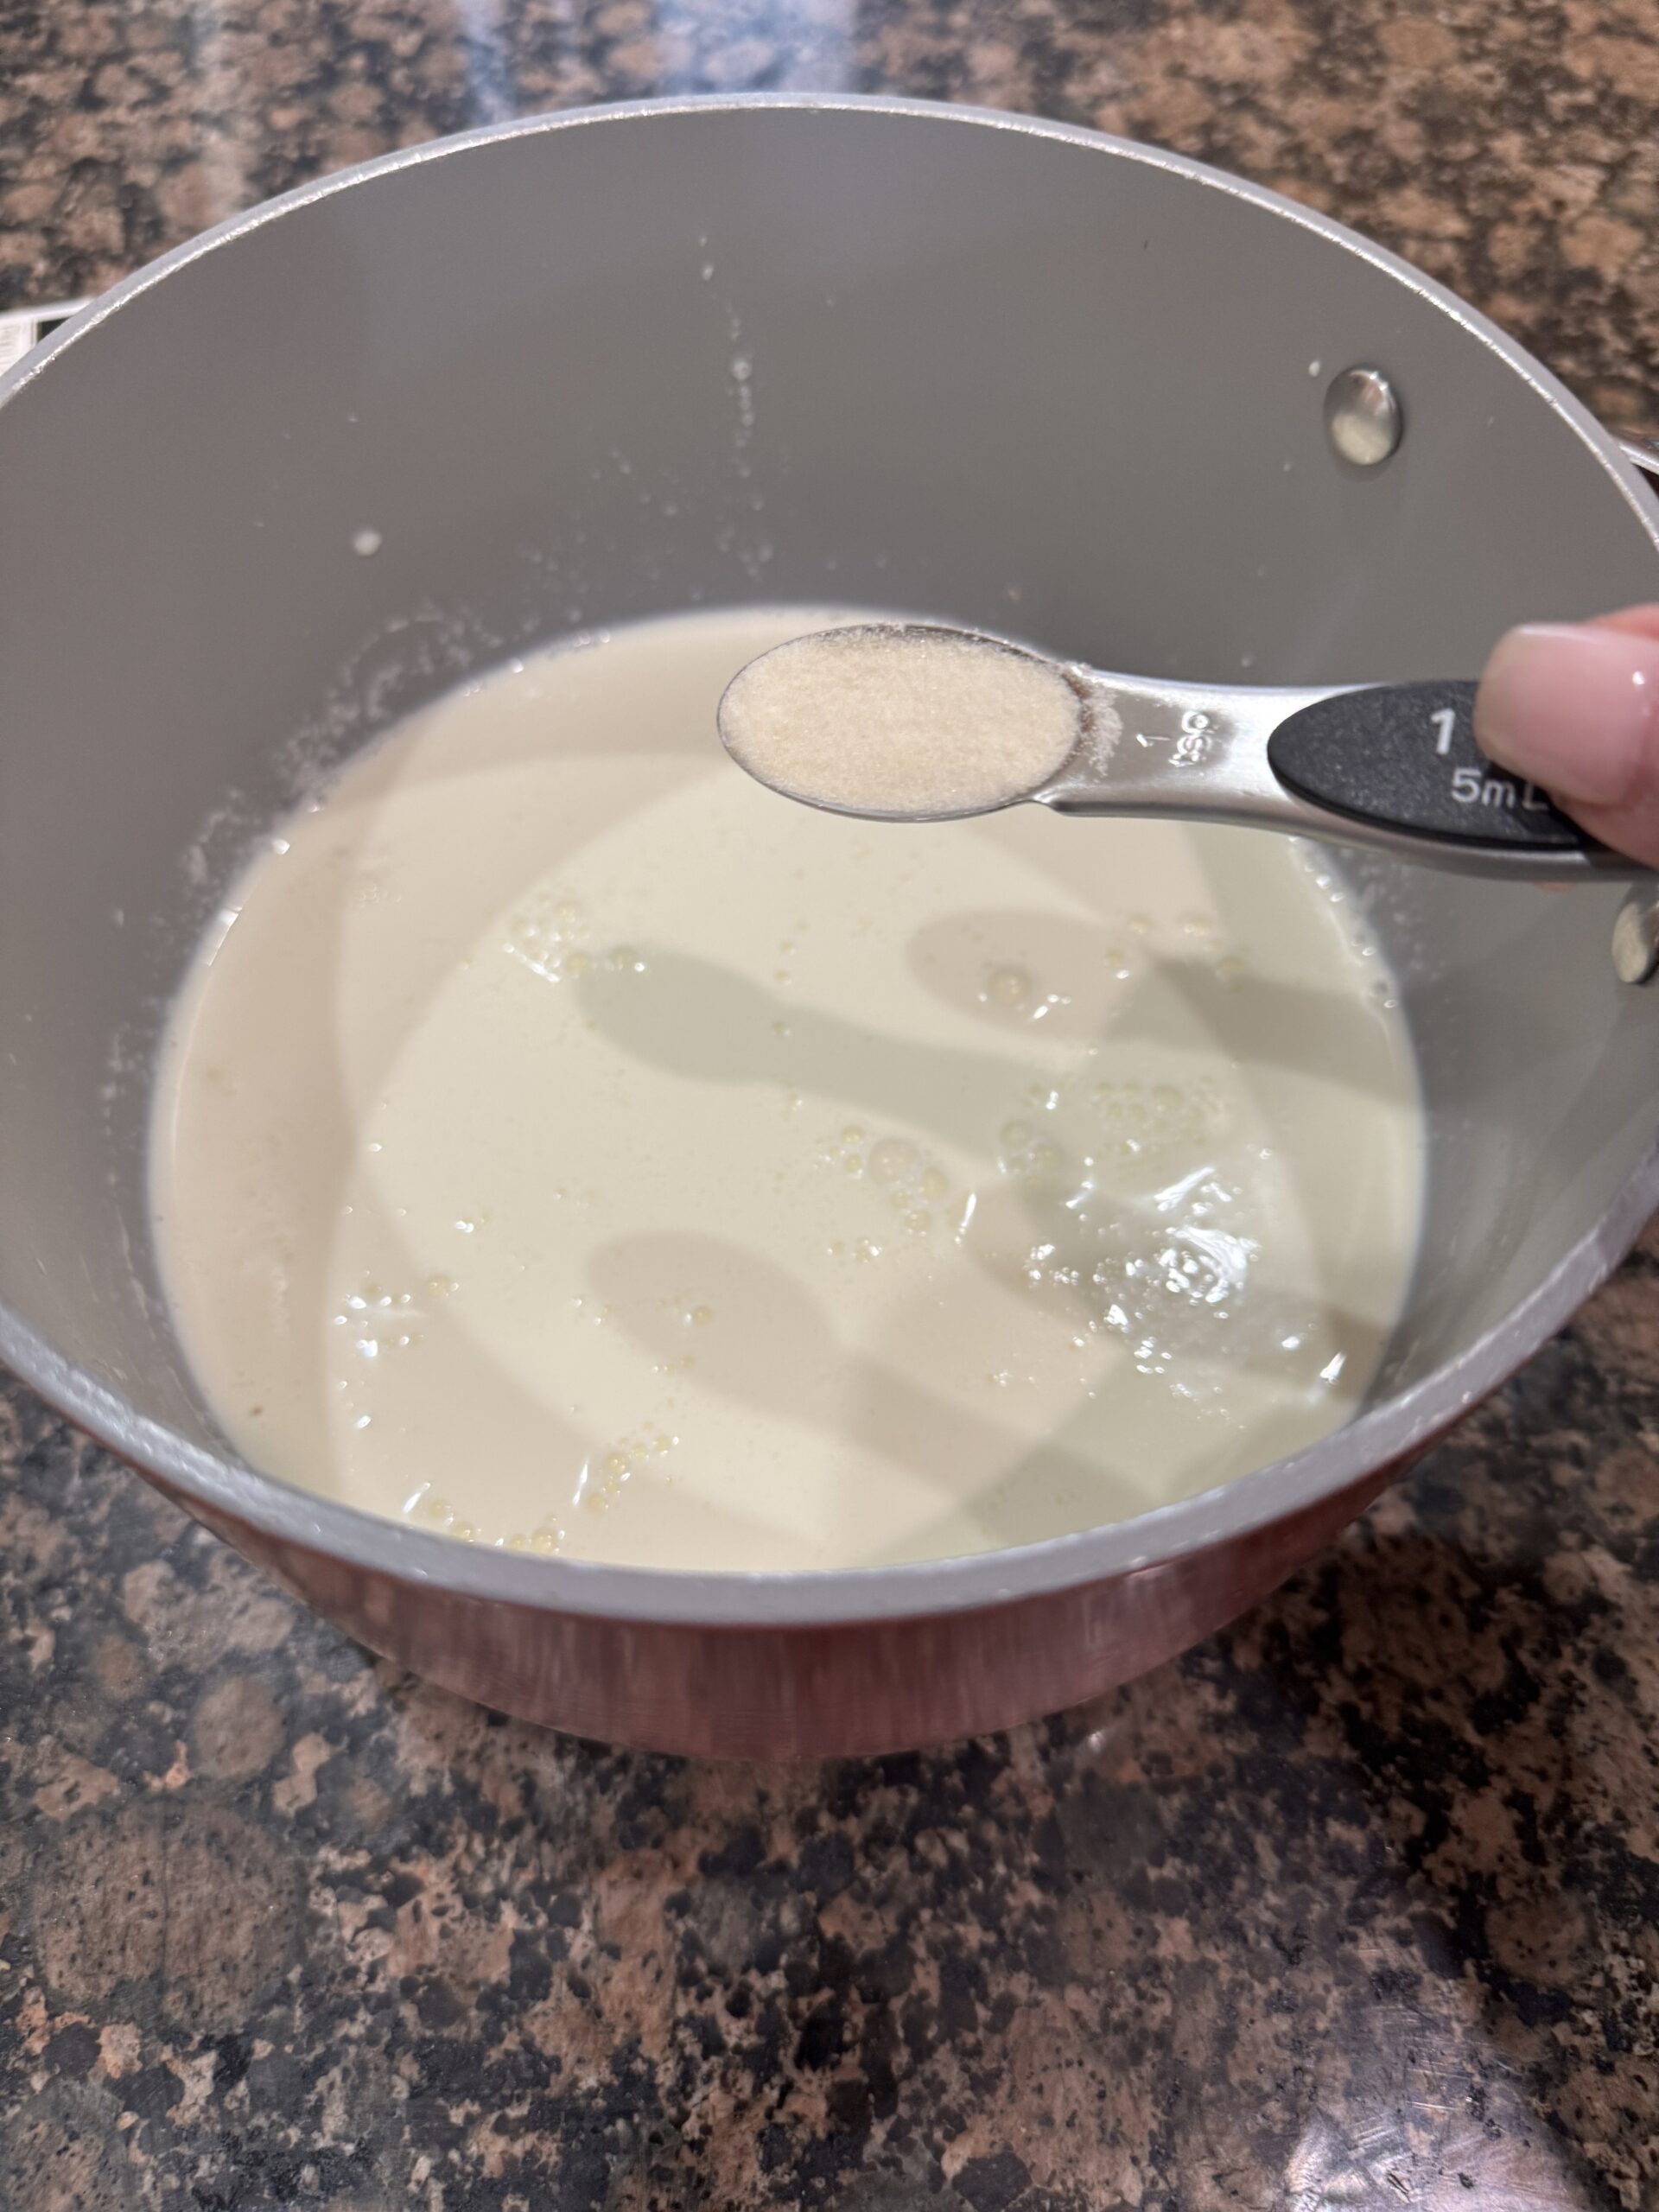
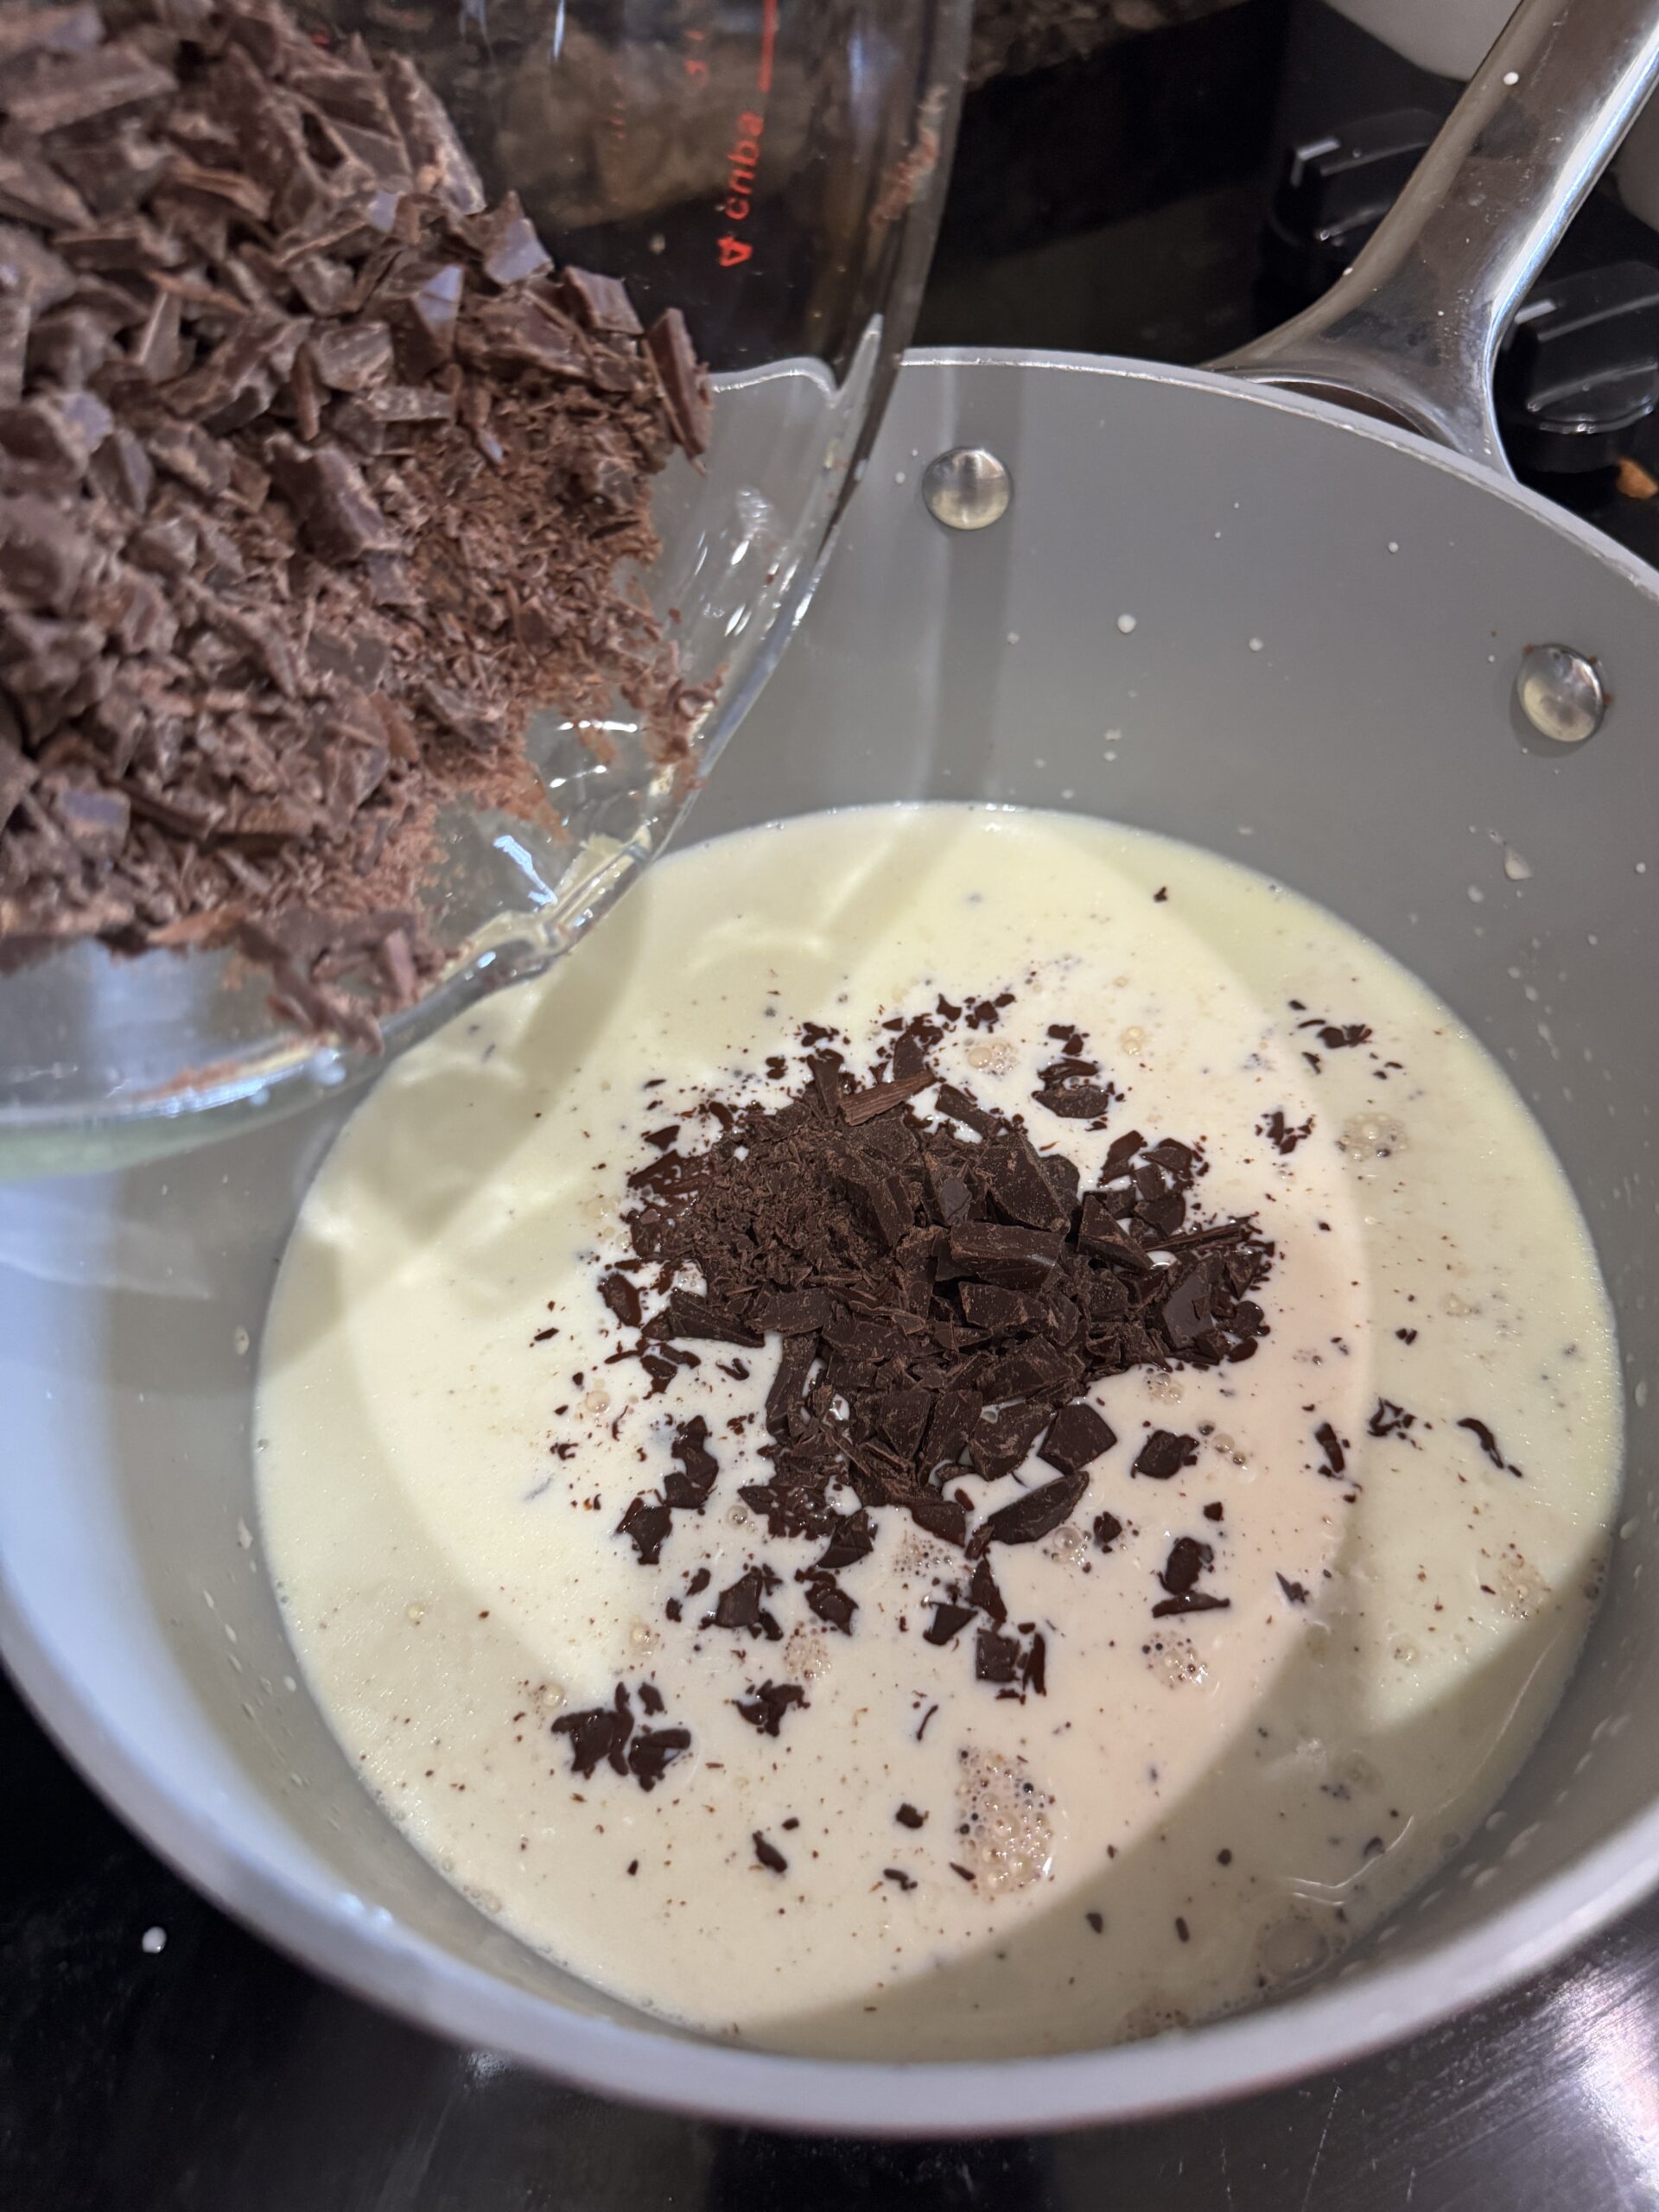
- Warm gelatin cream mixture over medium-high heat. If adding sugar, do so now. Stir until sugar and gelatin are completely dissolved. Do NOT bring to a boil. The mixture should be just warm enough to dissolve the gelatin and sugar. You should see steam coming from the pot, but it should not be simmering.
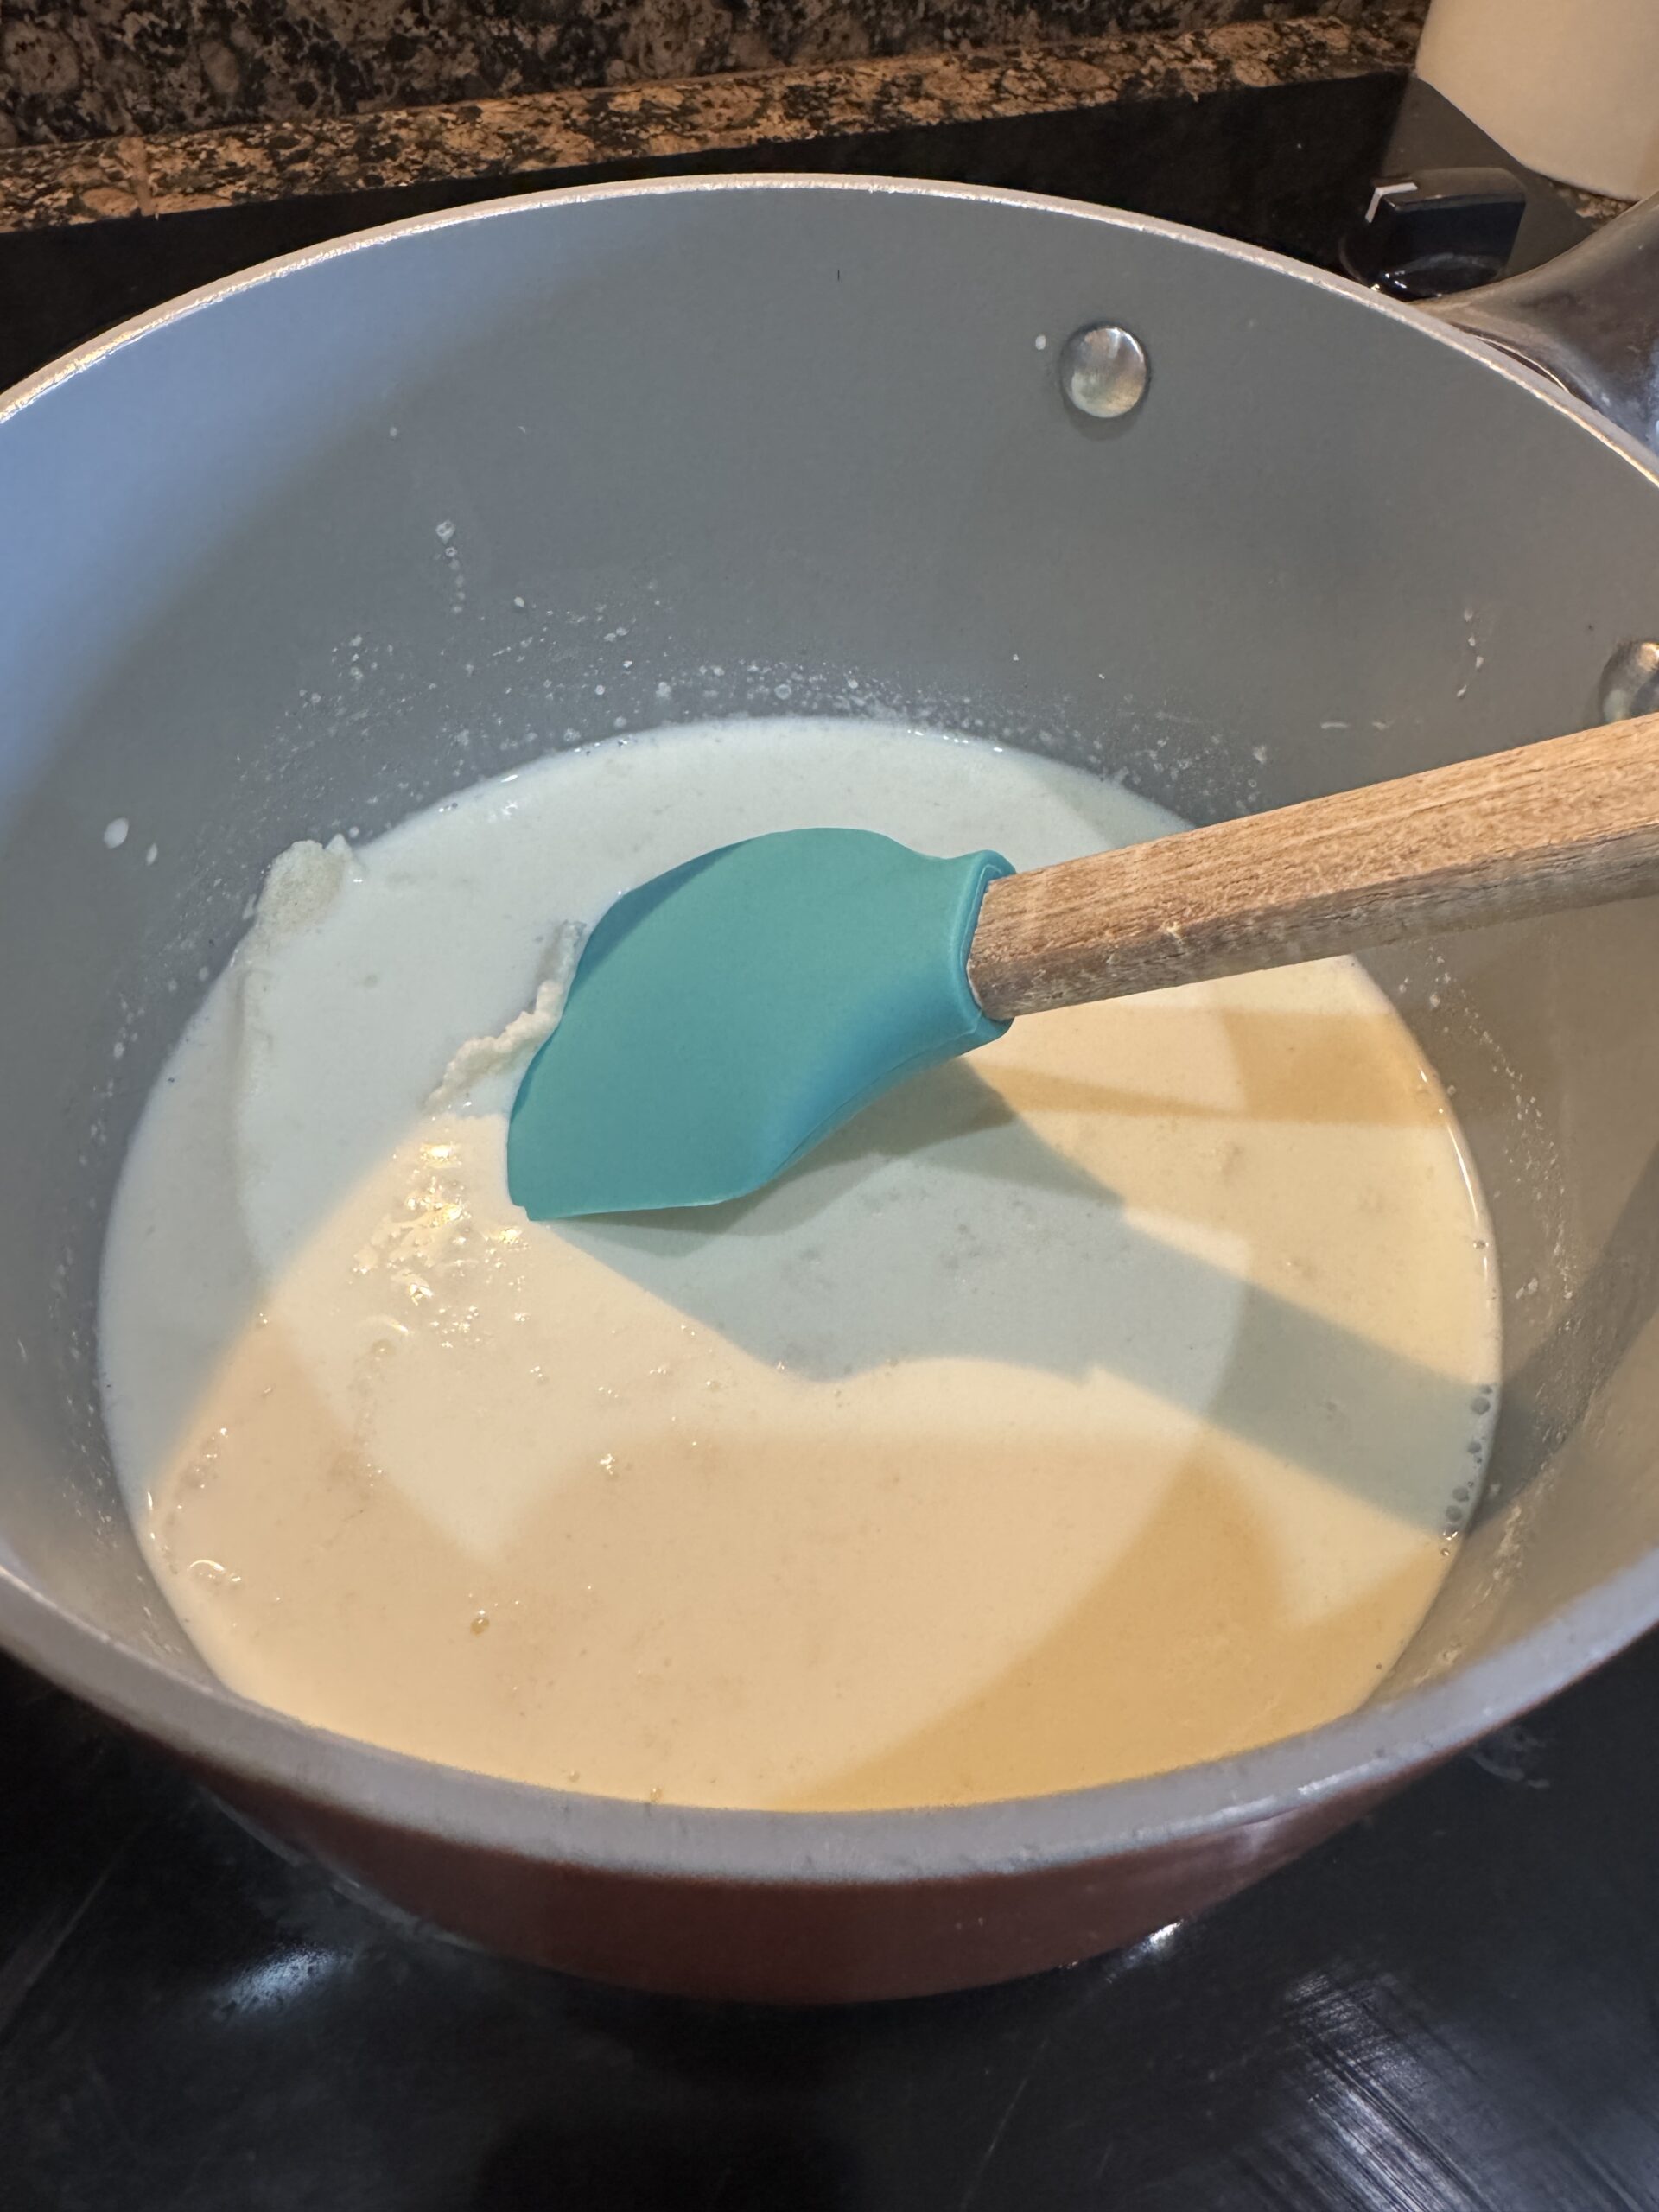
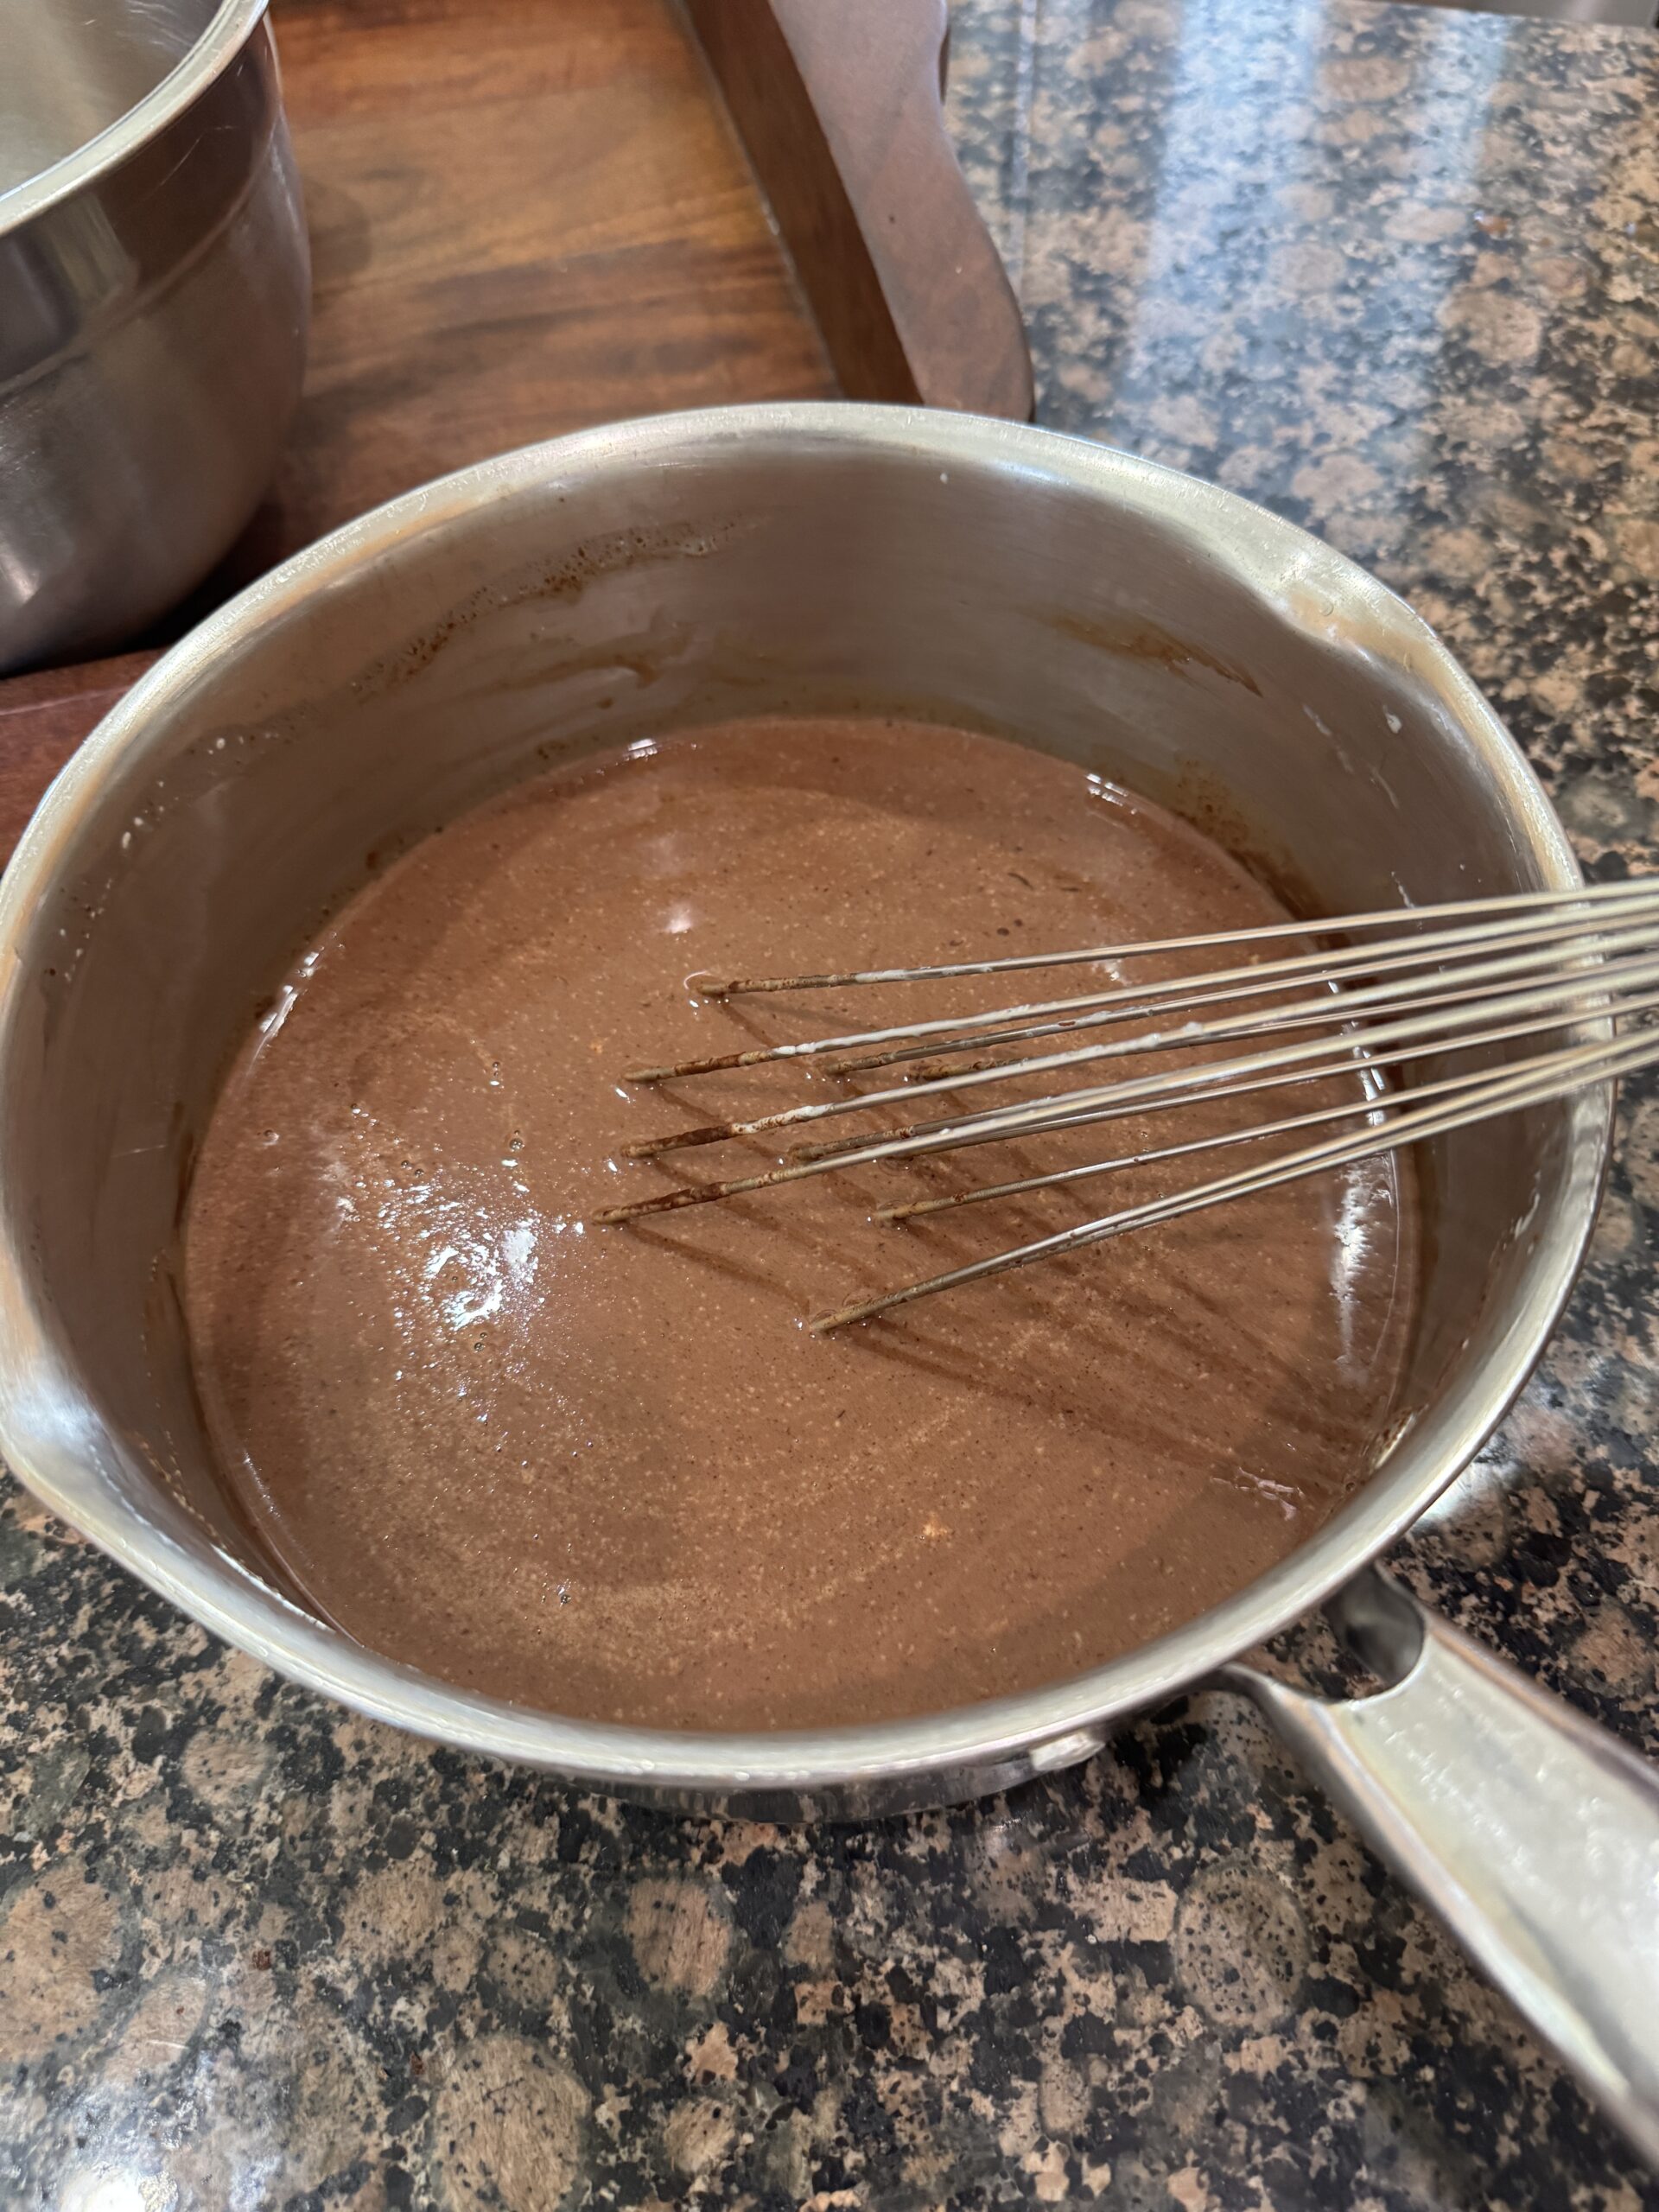
- Turn off heat and add the chocolate to the warm cream mixture. Whisk until smooth and chocolate is melted.
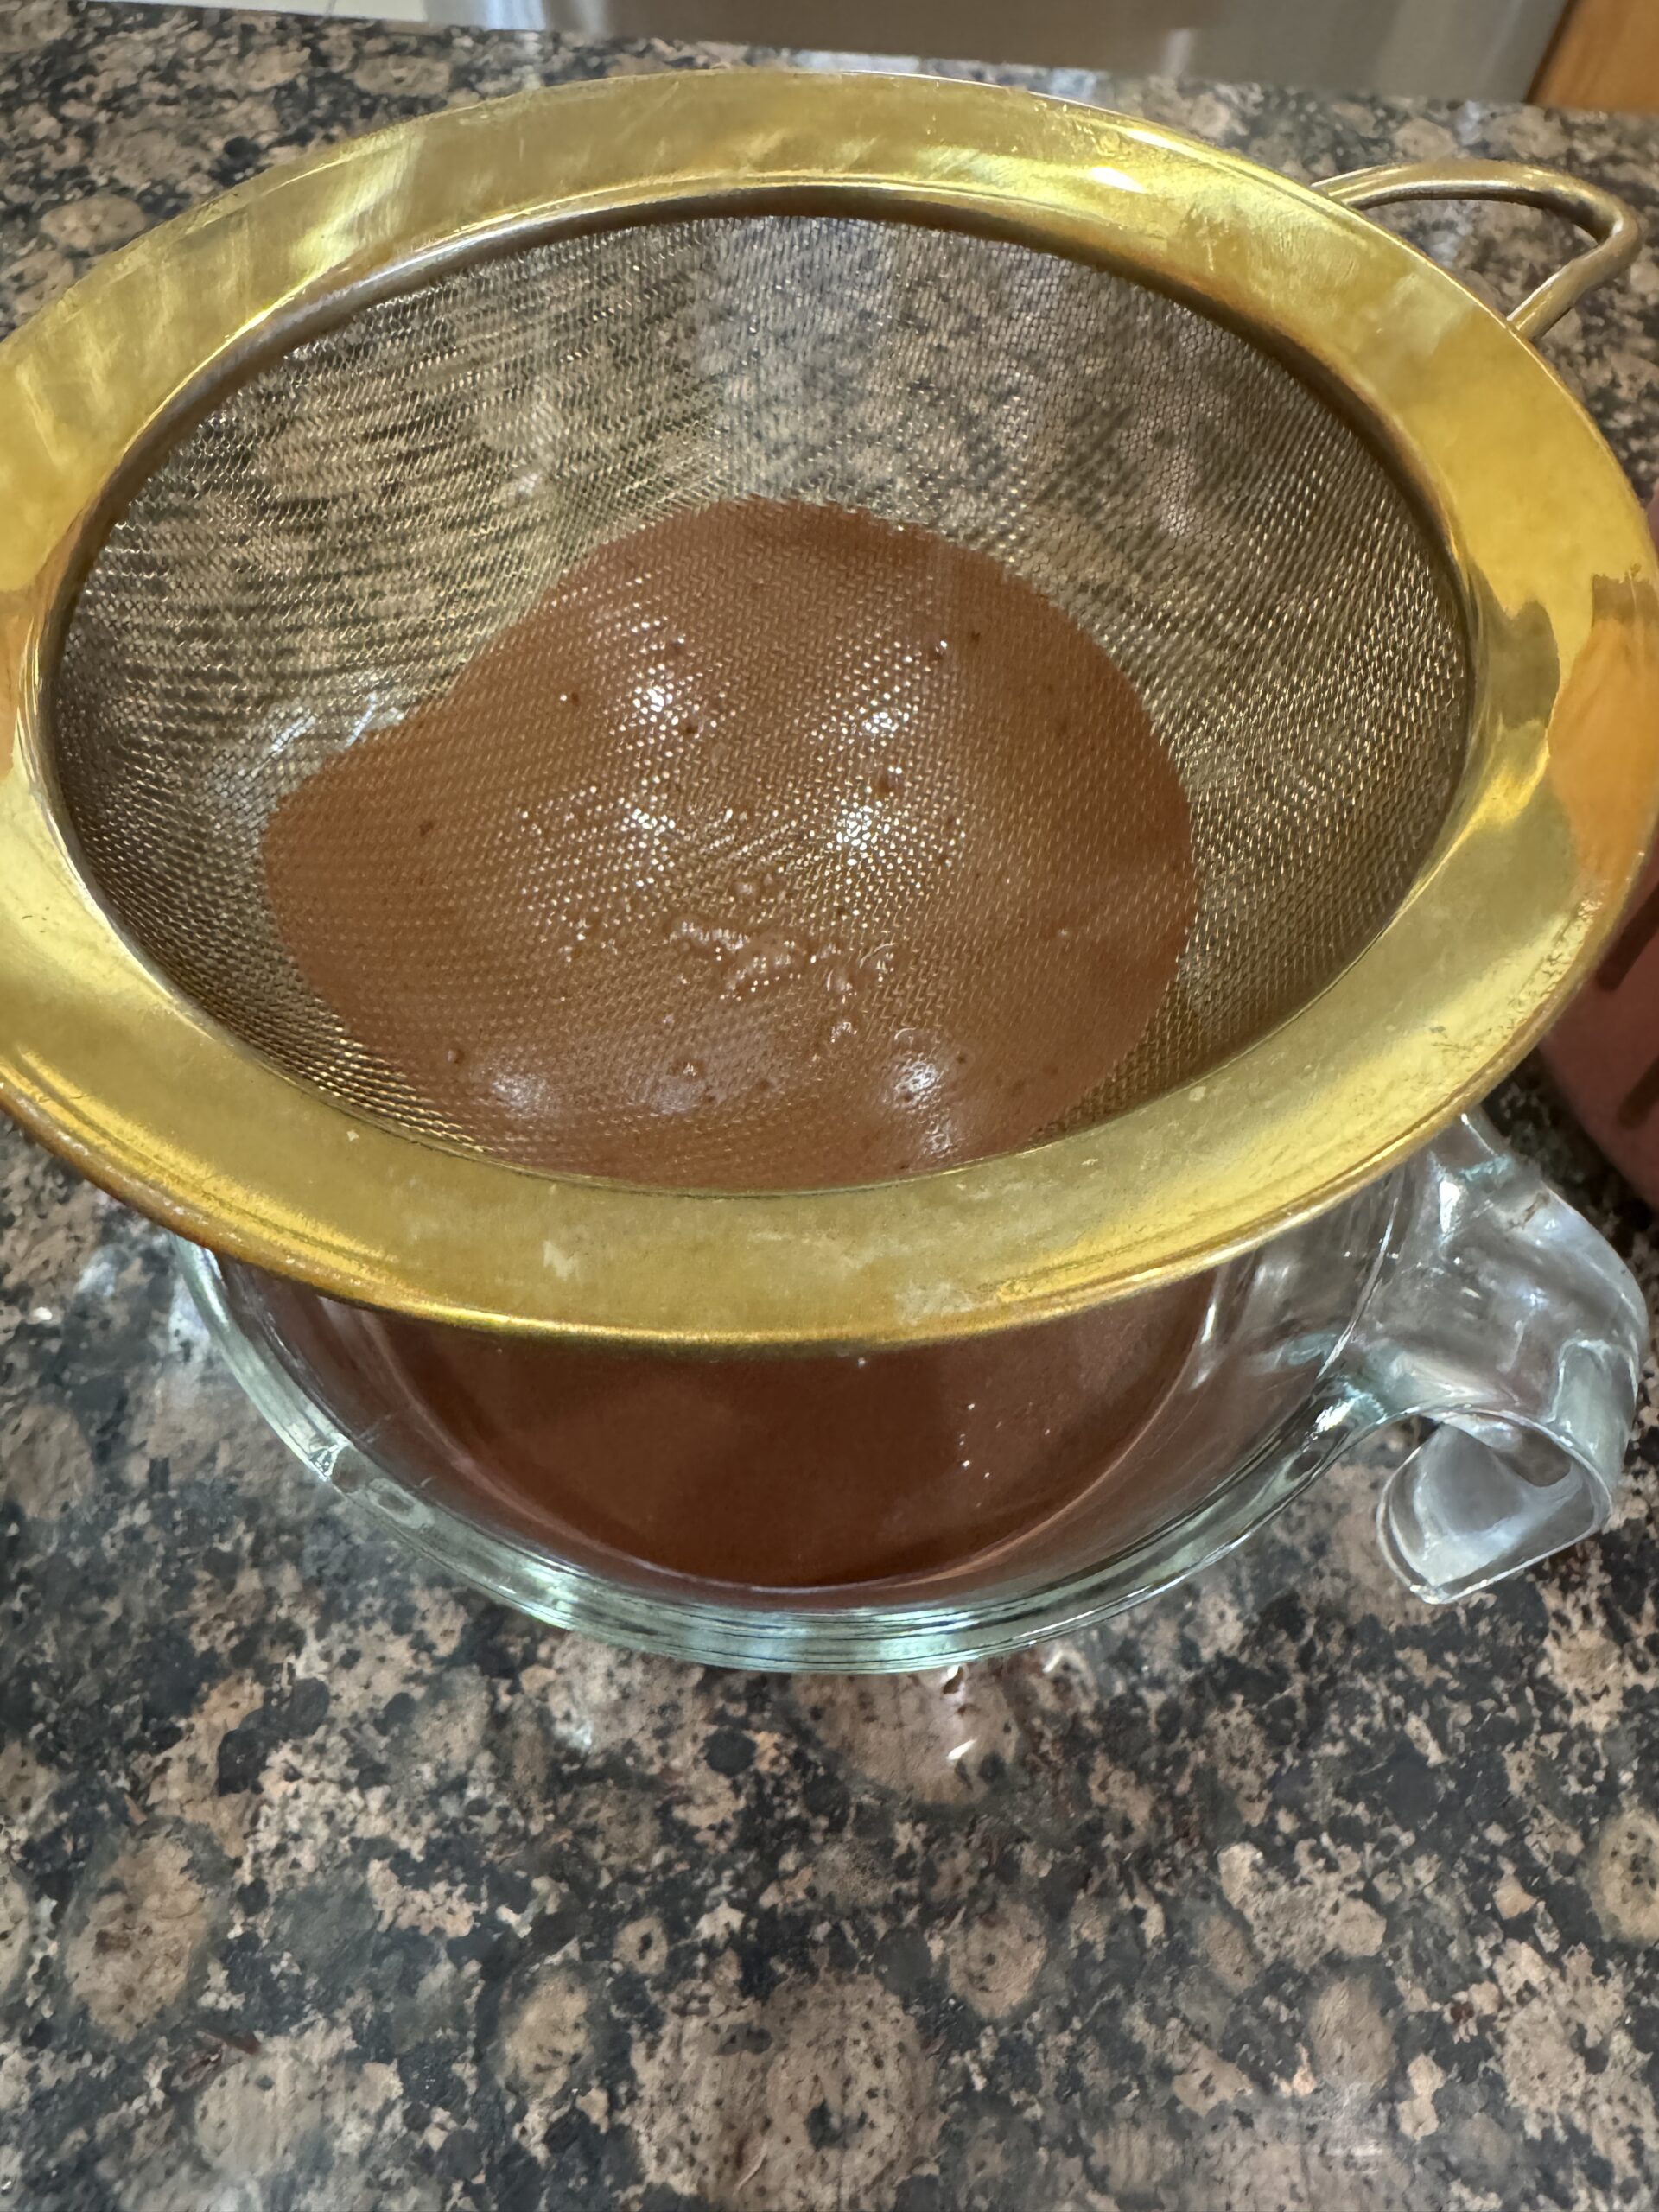
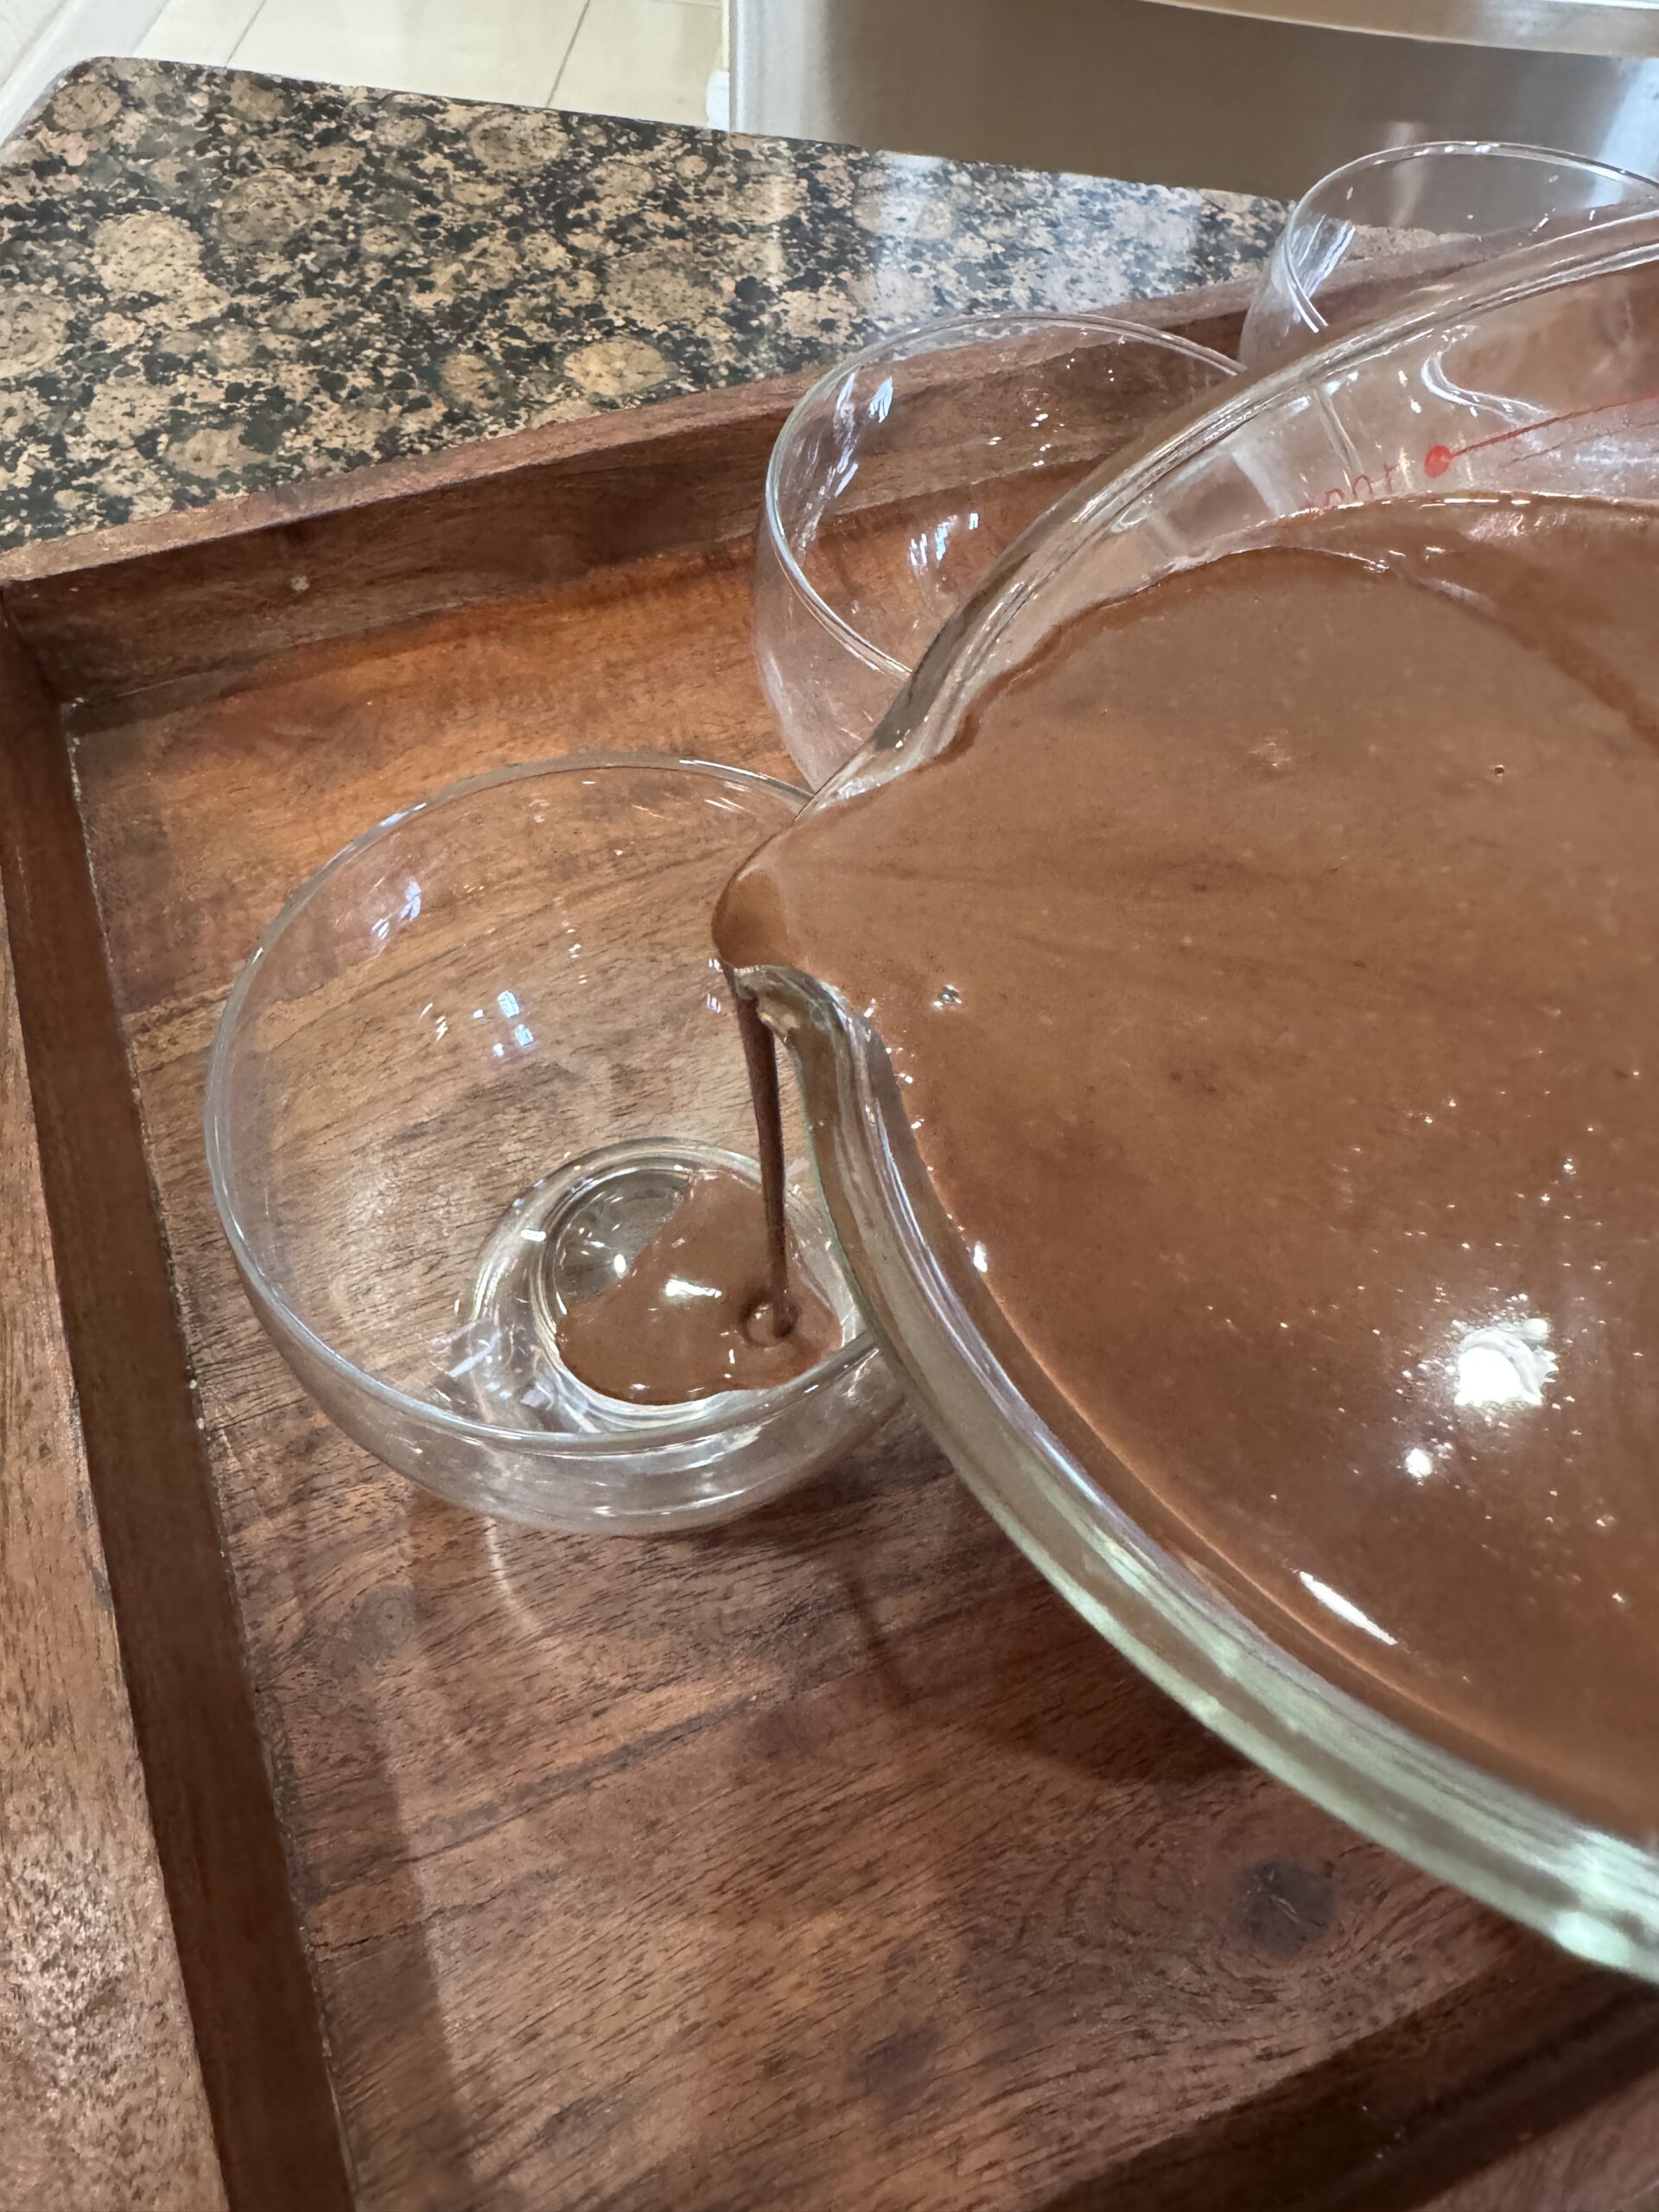
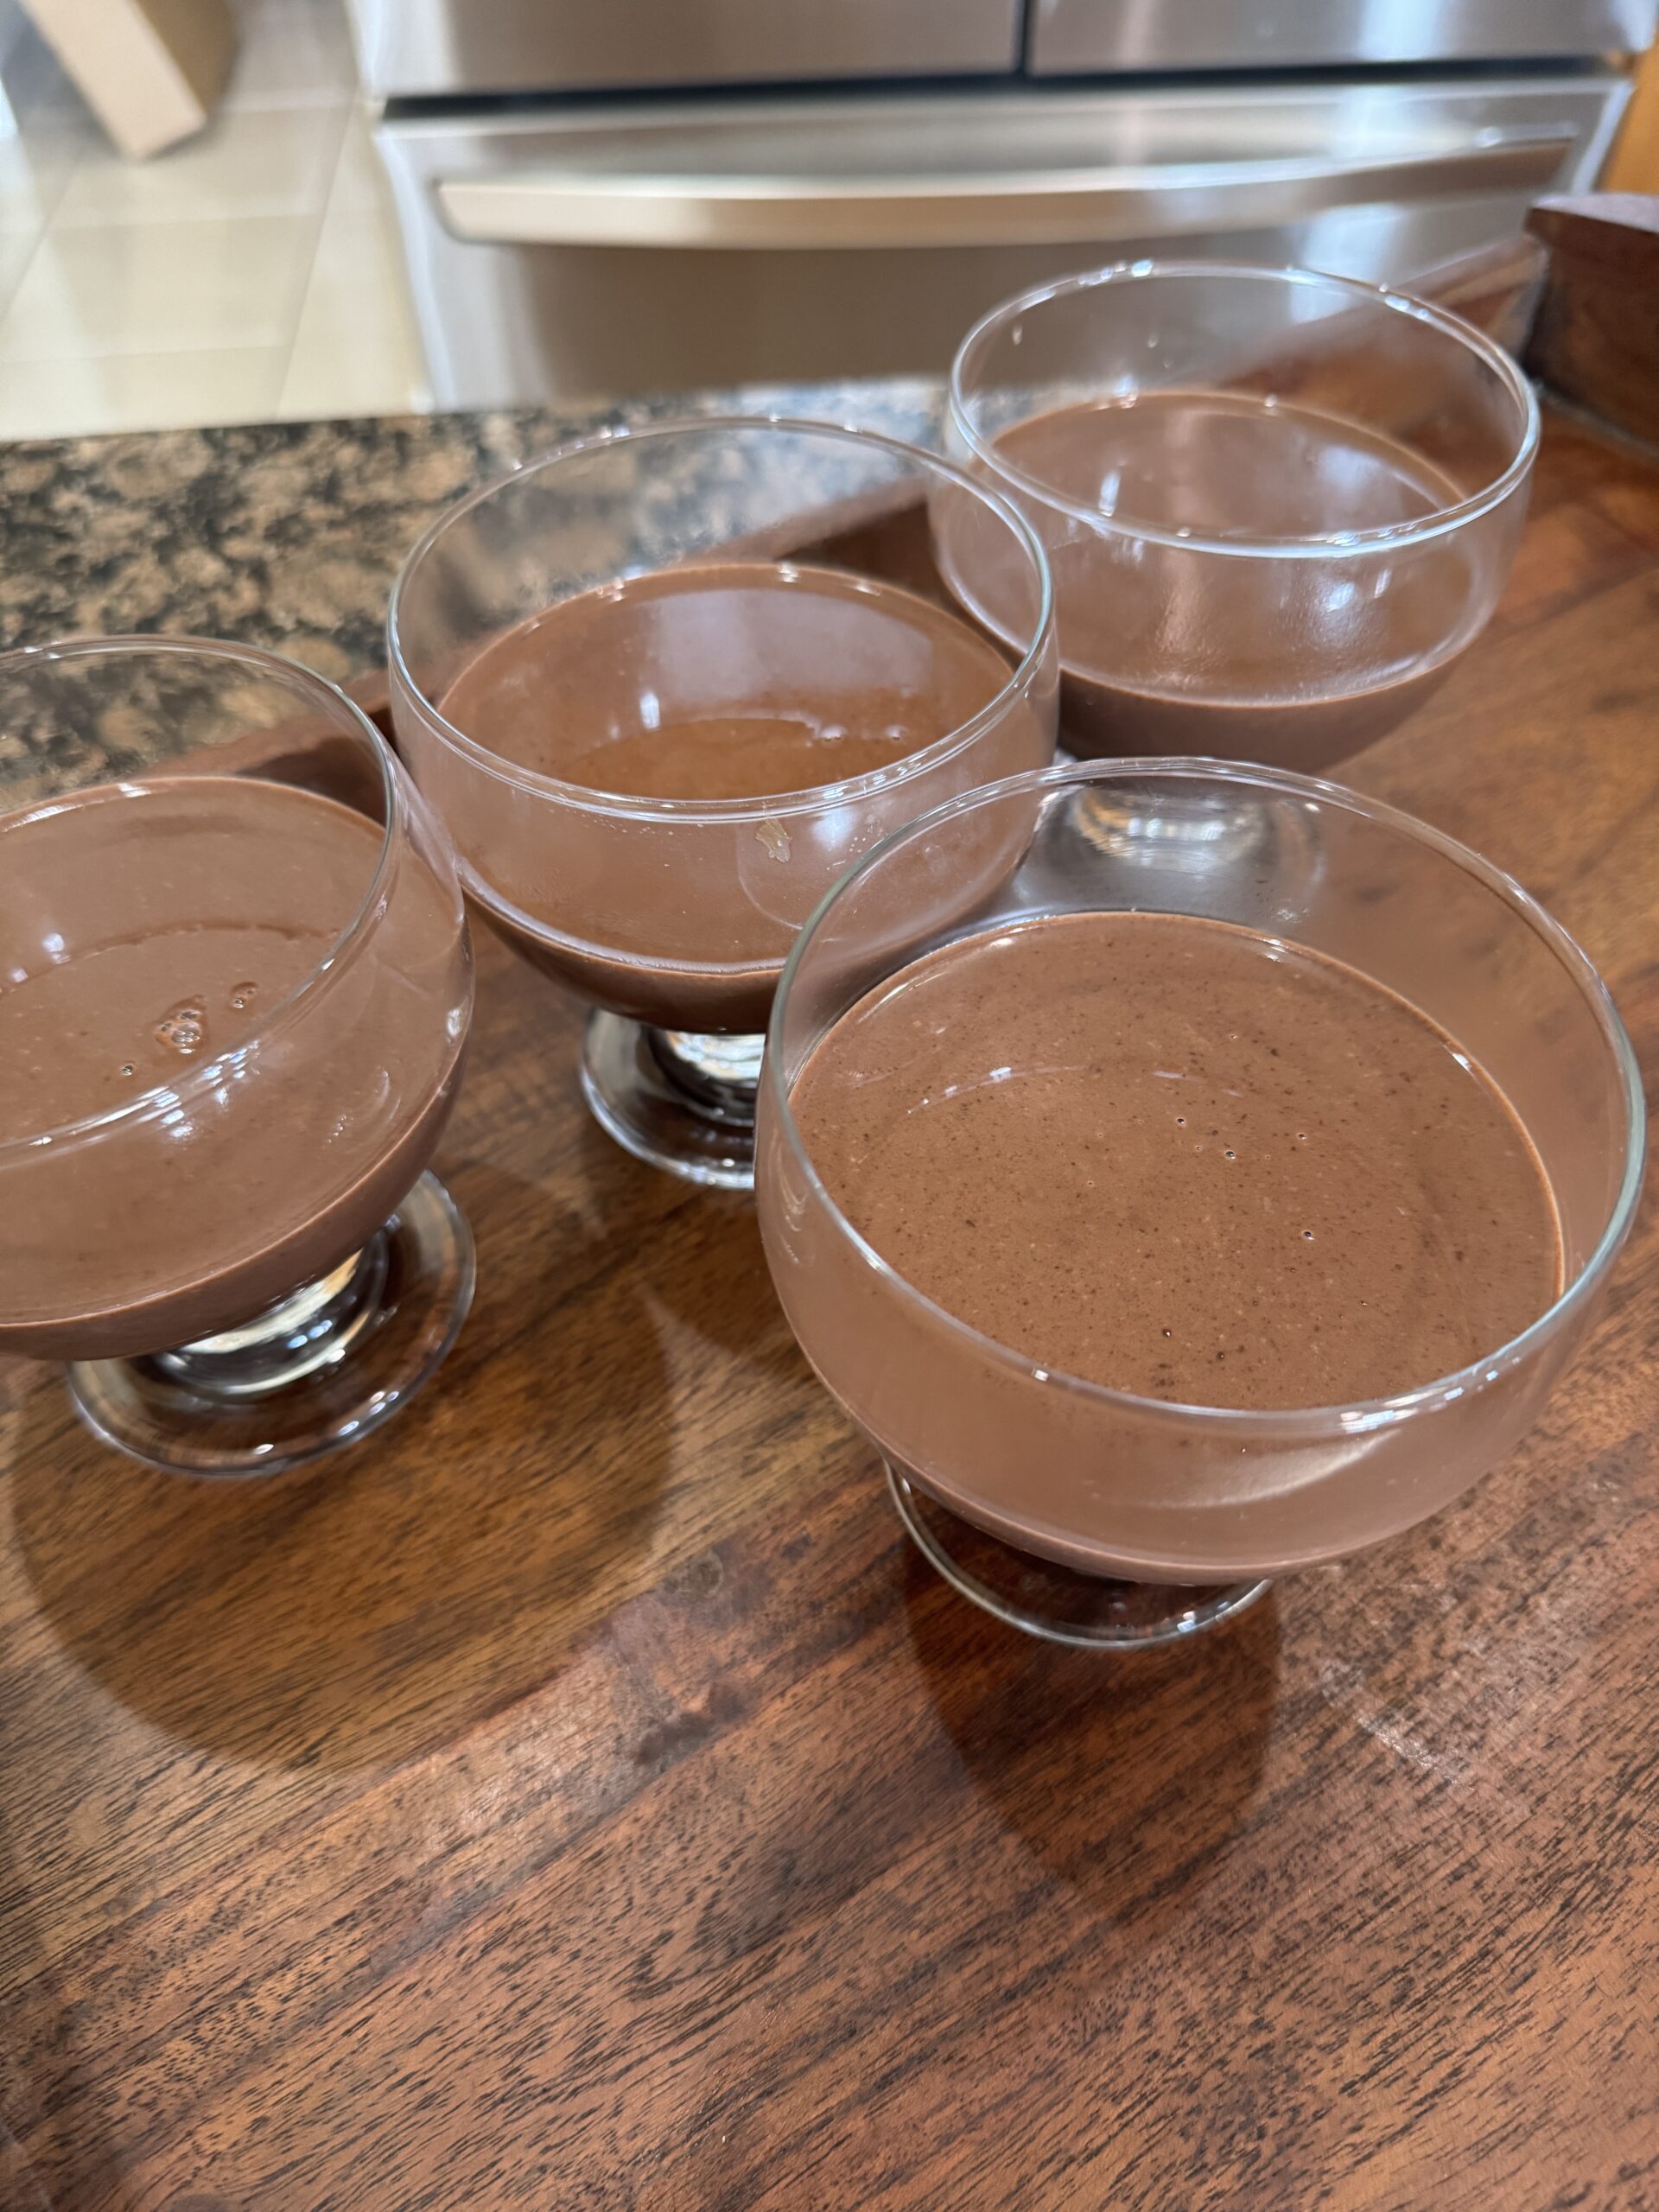
- Strain the mixture through a fine sieve, then pour into dessert glasses (or prepared ramekins). Cool completely.
- Refrigerate for at least 4-6 hours, or until set.
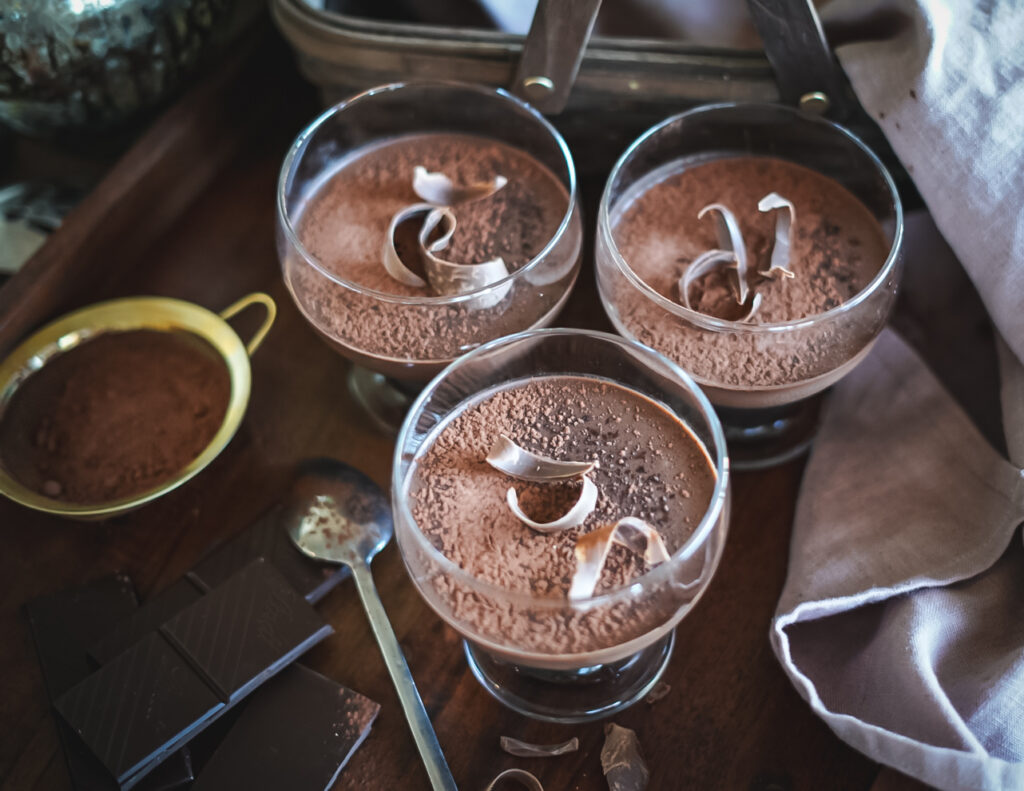
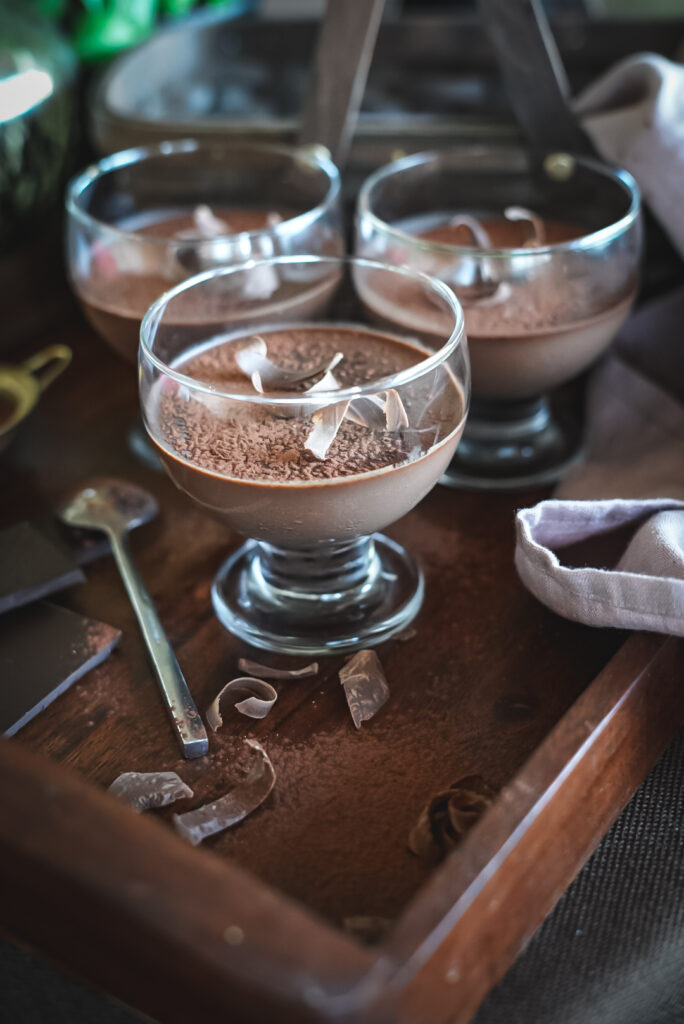
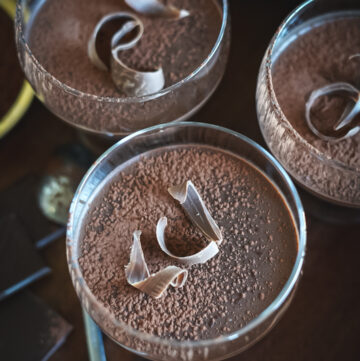
- Serve & Enjoy. If unmolding, dip the ramekin briefly in very warm water, then invert onto a plate and gently shake to release. You may need to run a knife around the edges to help. Top with whipped cream, fresh berries, chocolate shavings or a dusting of cocoa powder.
Chocolate Panna Cotta is a true crowd-pleaser that brings together the best of Italian simplicity and chocolate decadence. Serve this at a dinner party along with my fried pizza to impress your guests! Are you ready to indulge? Try making chocolate panna cotta and let me know how it turns out!
FAQ:
Can you put too much gelatin in panna cotta?
Too much gelatin could result in a texture that is too firm. The panna cotta should be just barely firm enough to unmold.
Why is my panna cotta rubbery?
Gelatin-based desserts are best eaten soon after they’re made. Panna cotta will develop a rubbery texture if it ages beyond four days.
Why won’t my panna cotta set?
1. Not Enough Gelatin
- If you didn’t use enough gelatin, your panna cotta will stay liquid.
- Fix it next time: Stick to the correct ratio—usually 2 teaspoons of powdered gelatin per 2 cups of liquid and 7 oz. of dark chocolate.
2. Gelatin Wasn’t Bloomed Properly
- Gelatin needs time to absorb liquid and soften before it can work its magic.
- Fix it next time: Sprinkle gelatin evenly over cold cream or milk, let it sit for 5-10 minutes, then heat gently until dissolved before adding chocolate.
3. Overheated Gelatin
- If you boil gelatin, it loses its setting power.
- Fix it next time: Always heat gelatin gently, just until it dissolves. Never let it boil!
4. Too Much Liquid
- If you added extra cream or milk without increasing the gelatin, your panna cotta won’t firm up properly.
- Fix it next time: Keep your liquid-to-gelatin ratio balanced.
5. Not Enough Chilling Time
- Panna cotta needs time to set properly—at least 4-6 hours, but overnight is best.
- Fix it next time: Be patient and don’t rush it. If it’s still soft after 4 hours, give it more time.
6. Your Gelatin is Expired or Weak
- Old or improperly stored gelatin can lose effectiveness.
- Fix it next time: Check your gelatin’s expiration date and store it in a cool, dry place.
Can I Fix a Runny Panna Cotta?
Yes! If your panna cotta hasn’t set after chilling:
- Reheat the mixture gently—do not let it boil.
- Bloom an extra ½ to 1 teaspoon of gelatin, dissolve it, and stir it into the warmed mixture.
- Strain, pour, and chill again for another 4-6 hours.
Why is my panna cotta grainy?
1. The Chocolate Didn’t Melt Properly
- If the chocolate wasn’t fully melted and incorporated, tiny bits of unmelted chocolate can create a grainy texture.
- Fix it next time: Chop your chocolate finely so it melts easily, and stir constantly while adding it to the warm cream mixture. If in doubt, use a whisk!
2. Overheated or Boiled Cream
- If your cream boiled, the fat might have separated, creating a slightly grainy or curdled texture.
- Fix it next time: Heat the cream gently over low to medium heat—never let it boil! Just warm it enough to dissolve the sugar and melt the chocolate.
3. The Gelatin Didn’t Dissolve Properly
- Undissolved gelatin can leave tiny lumps in the panna cotta, making it feel gritty.
- Fix it next time: Always bloom your gelatin properly—sprinkle it over cold cream/milk, let it sit for 5 minutes, then gently heat the mixture until fully dissolved before adding chocolate.
4. No Straining
- Even if you did everything right, small lumps can still sneak in.
- Fix it next time: Strain your mixture through a fine-mesh sieve before pouring it into serving dish or ramekins. This removes any last bits and guarantees the smoothest texture.
5. Low-Quality or Overprocessed Chocolate
- Some lower-quality chocolates contain stabilizers or grainy cocoa solids that don’t melt smoothly.
- Fix it next time: Use high-quality dark chocolate (at least 60% cocoa) and avoid chocolate chips (which are designed to hold their shape and don’t melt as smoothly).
Can I Fix Grainy Panna Cotta?
If your panna cotta hasn’t set yet, you can try gently reheating the mixture and whisking until smooth. Then strain it through a sieve before chilling. If it’s already set, unfortunately, there’s not much you can do except blend it into a milkshake and try again.
How to store chocolate panna cotta properly:
- Cool Completely – Let it cool to room temperature before refrigerating.
- Cover Well – Wrap each ramekin or serving dish with plastic wrap or use airtight containers to prevent it from absorbing fridge odors.
- Refrigerate – Store in the fridge for up to 3–4 days for the best texture and flavor.
- Avoid Freezing – Freezing can cause the texture to become grainy and separated, so it’s not ideal.
- Garnish Later – Add toppings like whipped cream, fruit, or chocolate shavings just before serving to keep everything fresh and visually appealing.
Chocolate Panna Cotta
Equipment
- 2 qt. sauce pan
- 6 8 oz. dessert glasses or ramekins
- whisk
Ingredients
- 1 Cup Heavy Cream
- 1 Cup Whole Milk
- 1/4 tsp. Salt
- 2 tsp. Powdered Gelatin
- 7 oz 70% Dark Chocolate
- 3 Tbsp. Sugar optional
Instructions
- If you plan to unmold the panna cotta, lightly grease ramekins with a neutral oil (such as vegetable or canola oil) and wipe out any excess with a paper towel. This will help release the dessert smoothly.
- In a 2-qt. saucepan, pour in the heavy cream and milk; add salt and stir. Once combined, sprinkle gelatin on top of the cold mixture. Allow gelatin to bloom for 5-10 minutes until softened. After 5 minutes, check to see if all of the gelatin is absorbing the liquid, if there are some dry spots remaining, spoon cream/milk mixture over those spots or gently stir.
- Warm gelatin cream mixture over medium high heat. If adding sugar, do so now. Stir until sugar and gelatin are completely dissolved. Do NOT bring to a boil. The mixture should be just warm enough to dissolve the gelatin and sugar. You should see steam coming from the pot, but it should not be simmering.
- Turn off heat and add the chocolate to the warm cream mixture. Whisk until smooth and chocolate is melted.
- Strain the mixture through a fine sieve, then pour into dessert glasses (or prepared ramekins). Cool completely.
- Refrigerate for at least 4-6 hours, or until set.
- Serve & Enjoy. If unmolding, dip the ramekin briefly in very warm water, then invert onto a plate and gently shake to release. You may need to run a knife around the edges to help. Top with whipped cream, fresh berries, chocolate shavings or a dusting of cocoa powder.
Video
Notes
- Use high-quality chocolate for the best flavor.
- Don’t let the mixture boil—gentle heating ensures a smooth texture.
- Lightly grease ramekins with neutral oil if you plan to unmold them easily.
Leave a Reply